
Salut les gourmands!
Is there any combination more luxurious and comforting than chocolate and hazelnut? I’d argue no! My love for these flavors started in a little pâtisserie during a frosty winter trip. I bought a handful of gorgeous, yet expensive, Chocolate Hazelnut Thumbprint Cookies, and they were gone before I even got back to the hotel. They were soft, buttery, and had that perfect, gooey center. Right then, I knew I had to recreate that magic at home—but with my own cozy, personal twist. After some delicious (and messy) experimentation, I perfected this recipe. These decadent Chocolate Hazelnut Thumbprint Cookies are everything you want in a holiday or special occasion treat: tender, intensely flavorful, easy to make, and they look stunning on any cookie platter. Get ready to master these ultimate holiday cookies and bring a touch of European elegance to your kitchen!
🍪 Recipe Overview: Elegance Meets Simplicity
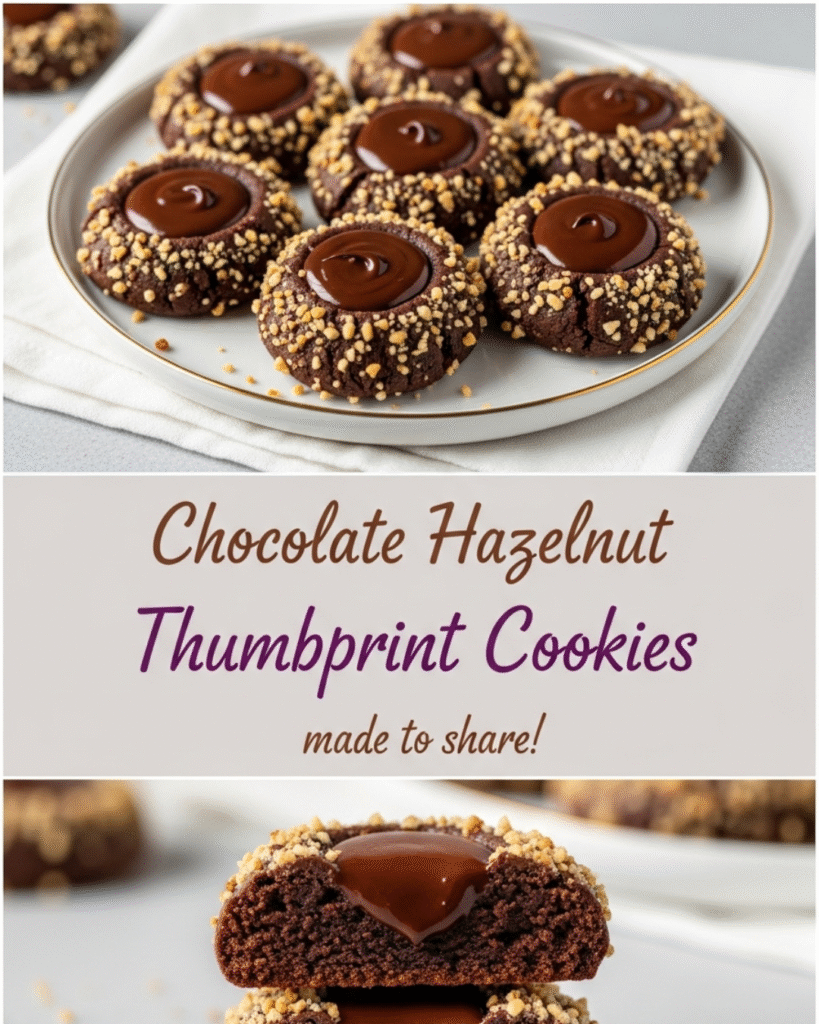
This recipe for Chocolate Hazelnut Thumbprint Cookies is a wonderful convergence of simplicity and sophisticated flavor. The base is a tender, shortbread-style cookie dough enriched with finely ground hazelnuts, giving it a delightful texture and nutty depth. The “thumbprint” is then filled with a rich, melted chocolate hazelnut spread—creating that irresistible gooey center that makes these cookies so decadent.
Details at a Glance
| Aspect | Value |
| Prep Time | 20 minutes |
| Chill Time | 30 minutes |
| Bake Time | 12-14 minutes |
| Total Time | ~1 hour |
| Yield | 24-30 cookies |
| Difficulty | Easy to Medium |
| Storage | Up to 5 days airtight at room temperature |
These decadent Chocolate Hazelnut Thumbprint Cookies are the ideal cookie to make ahead. They hold their shape perfectly and are actually even better the day after baking, allowing the hazelnut flavor to deepen into the buttery dough.
🌰 Ingredients for Decadent Flavor
The quality of your ingredients truly shines in a cookie recipe this simple. Splurge on good butter and a high-quality hazelnut spread for the best, most authentic flavor!
Cookie Dough Essentials
- All-Purpose Flour: 1 3/4 cups (210g)
- Hazelnuts (toasted): 1/2 cup (60g), very finely ground.
- Unsalted Butter: 1 cup (2 sticks or 225g), softened to room temperature.
- Granulated Sugar: 1/2 cup (100g)
- Brown Sugar (packed): 1/4 cup (50g)
- Egg Yolk: 1 large
- Vanilla Extract: 1 teaspoon
- Fine Sea Salt: 1/2 teaspoon
The Irresistible Filling & Garnish
- Chocolate Hazelnut Spread (Nutella or similar): About 1/2 cup
- Egg White: 1 large (for coating)
- Extra Hazelnuts (finely chopped): 1/2 cup (for rolling/coating)
- Confectioners’ Sugar (optional): For dusting
A Note on Hazelnuts: To maximize the flavor of your Chocolate Hazelnut Thumbprint Cookies, make sure your hazelnuts are toasted before grinding. This simple step intensifies their natural oils and nuttiness, adding an incredible depth that elevates the entire cookie. Toast them lightly in a dry pan until fragrant, let them cool, and then grind them into a fine meal.
🧑🍳 Preparation: Crafting the Perfect Thumbprint
The key to a beautiful thumbprint cookie is a cold, pliable dough that resists cracking. Follow these steps carefully to achieve tender centers and perfectly shaped cookies every time.
Step-by-Step Instructions
- Cream Butter and Sugars: In a large bowl or the bowl of a stand mixer, beat the softened butter, granulated sugar, and brown sugar together on medium speed until light and fluffy (about 3 minutes). Scrape down the sides of the bowl.
- Add Wet Ingredients: Beat in the egg yolk and vanilla extract until just combined.
- Combine Dry Ingredients: In a separate bowl, whisk together the flour, finely ground hazelnuts, and salt.
- Mix Dough: Gradually add the dry ingredients to the wet ingredients, mixing on low speed until the dough just comes together. Do not overmix! Overmixing develops too much gluten, which results in tough cookies. The dough should be soft but not sticky.
- Chill the Dough: Form the dough into a flat disk, wrap it in plastic wrap, and refrigerate for a minimum of 30 minutes. This chilling process makes the dough much easier to handle and prevents the cookies from spreading too much while baking.
- Shape and Roll: Preheat your oven to 350°F (175°C) and line two baking sheets with parchment paper. Take the dough out of the fridge. Whisk the egg white in a small shallow bowl. Place the chopped extra hazelnuts in a second shallow bowl. Roll the dough into 1-inch balls.
- Coat (Optional but Recommended): Dip each dough ball into the whisked egg white, letting the excess drip off, and then roll it in the chopped hazelnuts. This beautiful hazelnut coating adds crunch and visual appeal.
- Make the Thumbprint: Place the coated balls on the prepared baking sheets, spacing them about 2 inches apart. Use your thumb or the back of a rounded teaspoon to gently create a deep indentation (the “thumbprint”) in the center of each cookie ball. Be careful not to crack the edges.
- Bake: Bake for 6 minutes. Halfway through the baking process, gently remove the trays and use the back of the spoon again to deepen the indentations, as they often puff up slightly. Return to the oven and bake for another 6-8 minutes, or until the edges are lightly golden brown.
- Fill and Finish: Remove the cookies from the oven and immediately let them cool on the baking sheet for 5 minutes. While still warm, spoon or pipe about 1/2 teaspoon of the Chocolate Hazelnut Spread into each indentation. Let them cool completely on a wire rack so the filling sets slightly. Dust with confectioners’ sugar just before serving for a festive finish!
💡 Petit Conseil Pro: Achieving That Perfect Gooey Center
The chocolate hazelnut filling is the heart of these decadent Chocolate Hazelnut Thumbprint Cookies. My little trick ensures the filling stays soft, glossy, and perfectly gooey, even after the cookies cool.
Petit conseil pro: To make the filling easier to handle and gorgeously glossy, microwave the Chocolate Hazelnut Spread for about 10-15 seconds before filling the cookies. This warms and slightly thins the spread, allowing it to settle smoothly into the thumbprint. If you want an even richer chocolate flavor, melt 2 tablespoons of dark chocolate chips with the hazelnut spread before filling. This deepens the cocoa notes and provides a slightly firmer set, making them easier to stack.
Tips for Storage and Transport
- Freezing Dough: The unbaked dough freezes beautifully! Wrap the dough disk tightly and store for up to 3 months. Thaw overnight in the fridge before rolling.
- Filling Timing: If you are stacking the cookies for transport or storage, wait until the cookies are fully cooled and the filling is set. For the best gooey texture, you can even wait to fill them until just an hour before serving!
- Preventing Spreading: If you live in a very warm climate, consider substituting a tablespoon of the flour with cornstarch. Cornstarch helps tenderize the dough and prevents spreading, resulting in a beautifully intact cookie shape.
What is your favorite hazelnut dessert? I’m always looking for new ways to use this fantastic nut!
☕ Accompagnements Suggérés: The Perfect Pairing
These Chocolate Hazelnut Thumbprint Cookies are so rich and flavorful that they stand well on their own, but pairing them with the right beverage or dish can truly elevate the experience to pure luxury.
Perfect Pairings for the Ultimate Holiday Treat
- The Classic Beverage: A strong, dark roast coffee or a classic espresso. The bitterness of the coffee cuts through the richness of the chocolate and butter, creating a balanced flavor profile.
- Cozy Winter Drinks: Serve them alongside a mug of homemade thick Italian hot chocolate (cioccolata calda) or a vanilla-spiced chai latte. The warm spices enhance the nutty notes in the cookie.
- After-Dinner Indulgence: A small glass of sweet dessert wine, like an Italian Vin Santo, or a shot of Frangelico (a hazelnut liqueur) makes these cookies feel like a true fine-dining dessert.
- Ice Cream Sandwich: Smash the cooled cookies around a scoop of vanilla or coffee ice cream for a unique twist on the classic ice cream sandwich.
These cookies are often the star of my holiday cookie swap every year. They look fancy, but only we know how wonderfully simple they were to make!
🥳 Conclusion: Share the Decadence!
You have successfully navigated the steps to create truly decadent Chocolate Hazelnut Thumbprint Cookies—a holiday treat that marries buttery tenderness with the deep, comforting flavor of hazelnut and chocolate. You’ve mastered the art of the perfect thumbprint, the secret to the gooey center, and the technique for a flavorful hazelnut crust.
À vos tabliers! Go ahead and fill that platter with your beautiful, professional-looking creations. Whether you share them with loved ones or keep them all to yourself (no judgment here!), remember the joy of creating something so utterly delicious. Let the scent of toasted nuts and rich chocolate fill your home this season. Now it’s your turn to inspire others. Share a photo of your finished cookies and tell us who you’re sharing them with!
Bon appétit!