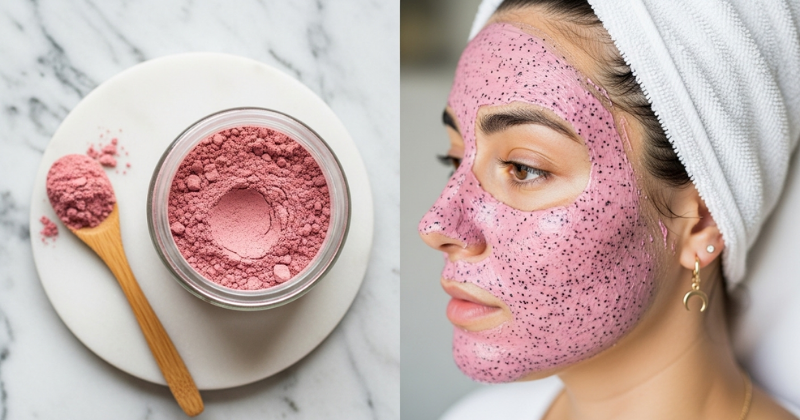
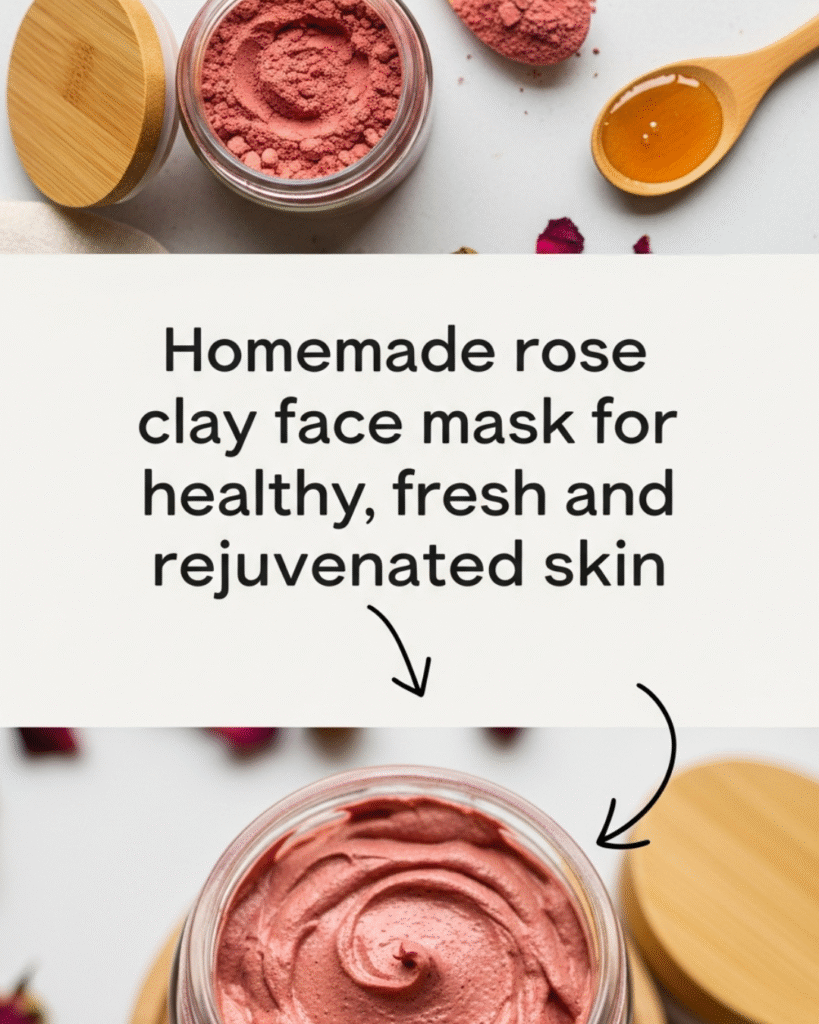
Ready to unlock the secret to a professional spa glow right in your own bathroom? Discover the magic of a homemade rose clay face mask! This gentle, mineral-rich treatment is the perfect solution for balancing, purifying, and calming your complexion, giving you healthy, fresh, and rejuvenated skin without the harsh chemicals or high price tag. We’ll guide you step-by-step to create this luxurious self-care ritual and help you achieve glowing skin naturally.
✨ The Foundation: Why Rose Clay is Your Skin’s New Best Friend
When you choose to make your own skincare, you take control of your beauty routine, ensuring only the highest quality, most beneficial ingredients touch your face. Rose clay, often called pink clay, is a gentle, natural ingredient derived from a combination of Kaolin (white clay) and Iron Oxides, which give it its beautiful pink hue. This unique composition makes it one of the most versatile and effective ingredients for a DIY face mask.
Unlike harsh green or bentonite clays, rose clay is significantly milder, making it ideal for nearly all skin types, especially those that are sensitive, dry, or mature. It offers a gentle detoxifying effect without stripping your skin of its natural moisture, which is the key to maintaining a healthy barrier and achieving that coveted rejuvenated skin look.
Understanding the Gentle Power of Pink Clay
Rose clay’s benefits come down to its dual action: it cleanses while it conditions. Its fine texture and mineral profile work synergistically to improve your complexion’s overall health.
- Gentle Detoxification: The clay particles work like a magnet, drawing out impurities, environmental pollutants, and excess sebum from your pores. This process purifies the skin without causing the excessive dryness that can lead to irritation or overproduction of oil.
- Mineral Enrichment: Rose clay is rich in silica, iron, and magnesium, essential minerals that are vital for skin health. These micronutrients help support cell regeneration and elasticity, contributing to a smoother texture.
- Calming and Soothing: The gentle nature of the clay helps to calm inflammation and reduce redness, leaving your skin looking fresh and even-toned immediately after use. It’s perfect for giving sensitive skin a detox without the drama.
🌹 Core Methods: The Essential Homemade Rose Clay Face Mask Recipe
Creating your own homemade rose clay face mask is incredibly easy and quick, making it a sustainable and cost-effective addition to your weekly self-care ritual. This core recipe is designed to be potent yet gentle, utilizing a balance of absorbent clay and hydrating liquids to deliver that healthy skin glow.
The Basic Recipe for a Single Use Mask
You’ll be mixing two main elements: the Rose Clay (your powder base) and a Hydrating Liquid (your activator). Always aim for a yogurt-like consistency—smooth and thick enough to spread, but not so dry that it crumbles.
| Ingredient | Quantity | Key Function |
| Rose Clay Powder | 1 Tablespoon | Purifying, detoxifying, calming |
| Filtered Water or Rose Water | 1 to 1.5 Teaspoons | Hydration, consistency, aroma (if using rose water) |
Step-by-Step Mixing Instructions:
- Prep Your Tools: Gather a small, non-metal bowl (metal can sometimes react with the minerals in the clay) and a non-metal stirring tool (like wood, ceramic, or plastic).
- Measure the Clay: Place 1 tablespoon of rose clay powder into the bowl. This is the foundation of your nourishing face mask.
- Slowly Add Liquid: Begin by adding 1 teaspoon of your chosen liquid (filtered water for purity, or rose water for extra soothing benefits). Stir gently.
- Adjust Consistency: Continue adding drops of the liquid until you reach a smooth, creamy paste. It should spread easily over your face without dripping. Avoid making it too watery; consistency is key to a mask that adheres well and draws out impurities effectively.
- Apply and Relax: Spread a thin, even layer over clean, dry skin, avoiding the delicate eye area. Let the mask sit for 7 to 10 minutes.
Timing is everything: Unlike some stronger masks, you should remove the rose clay face mask just as it begins to dry and tighten, but before it feels completely brittle or uncomfortable. This ensures maximum impurity absorption without over-drying your skin.
- (Internal Link Opportunity: For a deeper understanding of activators, check out our guide on “Choosing the Best Liquids for DIY Clay Masks.”)
🍯 Advanced Strategies: Customizing Your Mask for Your Skin Type
The true beauty of a homemade rose clay face mask is its adaptability. You can easily modify the base recipe with beneficial liquid activators and nutrient-rich additions to specifically target your personal skincare goals—whether that’s fighting blemishes, boosting hydration, or achieving an intensely rejuvenated skin look.
Custom Activators: Upgrading from Water
The liquid you use to mix your clay can drastically change the final benefits of your mask. Move beyond water and use these potent liquids to unlock next-level results:
- For Dry or Mature Skin: Honey and GlycerinIf you are prone to dryness, a straight water or rose water mix can feel too drying. By using raw honey and vegetable glycerin, you introduce powerful humectants that draw moisture into the skin, preventing the clay from pulling too much hydration away.
- The Mix: Substitute 1/2 teaspoon of the water with liquid vegetable glycerin and another 1/2 teaspoon with raw, organic honey. Stir thoroughly. This version purifies while leaving a plump, dewy finish, perfect for achieving a truly healthy, fresh appearance.
- For Oily or Acne-Prone Skin: Aloe Vera Juice and Tea Tree OilFor those struggling with excess sebum and breakouts, the goal is enhanced purification and antimicrobial action without aggressive drying. Aloe vera juice is soothing, and tea tree essential oil is a scientifically-backed cleanser.
- The Mix: Use Aloe Vera juice as your main liquid activator instead of water. After mixing the clay and aloe, add 1 drop (no more!) of pure tea tree essential oil. This version will help draw out impurities, soothe existing blemishes, and prevent future ones.
Important Note on Essential Oils: Essential oils are potent and must be used sparingly. One drop per single-use mask is sufficient for added benefit and scent. For more on safe use, see our article on “Safely Integrating Essential Oils into Your Skincare Routine.”
🛑 Troubleshooting and Common Challenges
It’s easy to feel frustrated when a DIY mask doesn’t work exactly as planned. Most problems with a homemade rose clay face mask are simple to fix and relate to either consistency, timing, or post-mask care. Don’t let a minor setback derail your journey to healthy skin!
Featured Snippet Potential: “How long should I leave a rose clay mask on for?”
The golden rule is 7 to 10 minutes, or until the mask is about 80% dry.
You should remove the mask before it feels completely stiff, brittle, or cracked. A common mistake is leaving a clay mask on until it is completely dry. When clay is completely dry, it begins to pull moisture from the surface layers of your skin, which can cause dryness, irritation, and even lead to your skin overproducing oil later to compensate. By rinsing it off when it is just starting to tighten, you gain the maximum benefit of impurity extraction while minimizing moisture loss, ensuring your skin remains fresh and rejuvenated.
Addressing Post-Mask Redness and Tightness
If your skin looks red or feels uncomfortably tight after rinsing off your mask, here are the likely culprits and solutions:
| Issue | Cause | Solution |
| Excessive Tightness/Dryness | Mask was left on too long, or the mix was too clay-heavy. | Solution: Leave the mask on for a shorter time (try 5-7 minutes next time). For the current dryness, apply a hydrating serum immediately. |
| Mild Redness/Irritation | Skin is sensitive, or the mask was mixed too thick, making it harder to remove. | Solution: Next time, ensure your mask is wetter (add more rose water). Use cool water to rinse, and always follow up with a calming facial oil or moisturizer. |
| Uneven Drying | Applying the mask unevenly (too thick in some spots, too thin in others). | Solution: Use a clean, soft cosmetic brush to apply the mask evenly across your entire face, ensuring a uniform layer for consistent drying. |
📈 Maximizing Results: Post-Mask Care and Long-Term Skin Health
The immediate effects of the homemade rose clay face mask are impressive—freshness, clarity, and a subtle glow. However, the steps you take after the mask are just as critical for sealing in moisture and achieving that long-term rejuvenated skin look.
The Essential Post-Mask Protocol
Never leave your skin bare after using a clay mask. A mask temporarily lifts impurities and prepares your skin to receive nourishment. Maximize this opportunity!
- Tone and Balance: Immediately after gently patting your face dry, mist with pure rose water or a pH-balancing toner. This reintroduces hydration and helps reset the skin’s natural barrier function.
- Serum Step: While your skin is still damp, apply a targeted serum (like Vitamin C for brightening, or Hyaluronic Acid for deep hydration). Damp skin allows these powerful ingredients to penetrate more effectively.
- Seal and Protect: Finish with a high-quality moisturizer or a nourishing facial oil (such as jojoba or argan oil) to lock in the hydration and protect the surface of your healthy skin from environmental factors.
Integrating the Mask into a Sustainable Routine
For the best results, use your homemade rose clay face mask once or twice a week. Consistency is far more effective than aggressive, infrequent use. Use this gentle mask as a moment to pause, practice self-care, and reconnect with your wellness goals. Remember, your skin is a reflection of your overall health, so be supportive and non-judgmental as you commit to gradual, positive changes.
- (Internal Link Opportunity: For complete care, discover “The Benefits of Double Cleansing Before Applying a Face Mask.”)
💖 Conclusion: Embrace Your Natural Glow
You’ve learned how to harness the calming and purifying energy of rose clay to create a luxurious, effective, and deeply nourishing homemade rose clay face mask. This simple DIY project empowers you to achieve healthy, fresh, and rejuvenated skin with pure, natural ingredients you can trust.
Feel the transformation as your skin looks clearer, brighter, and calmer—a testament to the power of mindful, natural skincare. Continue to nurture your skin with this supportive ritual, and watch your natural radiance unfold and achieve its fullest potential. You deserve this pampering, and the journey to glowing, beautiful skin starts right here!