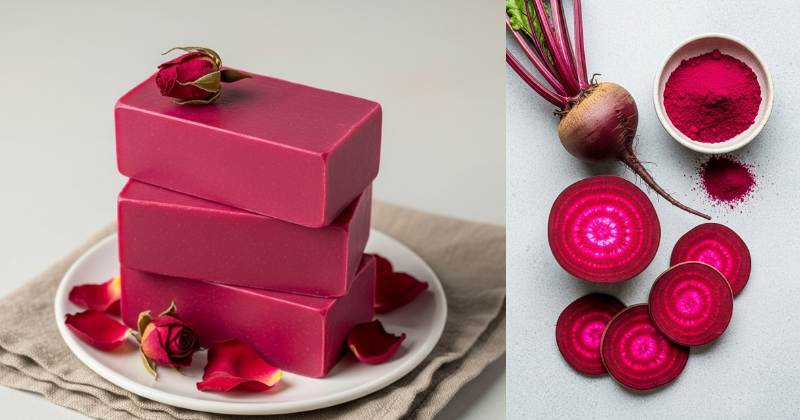
Are you ready to transform your skincare routine using the vibrant power of nature? The secret to achieving truly glowing skin might be sitting in your vegetable drawer. Beetroot is rich in antioxidants, vitamins, and minerals, making it an incredible natural ingredient for enhancing complexion and providing a beautiful, rosy hue to homemade products. Learning how to make beetroot soap is an empowering DIY project that allows you to control every ingredient, ensuring a gentle, moisturizing, and effective bar. Whether you’re a seasoned soaper or a curious beginner, this comprehensive guide will give you the achievable, step-by-step instructions to create your own signature beetroot soap and discover the benefits of truly natural cleansing.
🧼 Foundation First: Why Beetroot is a Skincare Hero
Before we dive into the saponification process, let’s understand the immense benefits that make beetroot soap for glowing skin so desirable. The beetroot isn’t just a root vegetable; it’s a powerhouse of beneficial compounds perfectly suited for topical use.
H3: The Science Behind Beetroot’s Benefits
The vibrant color of the beetroot comes from betalains, which are potent antioxidants and anti-inflammatory compounds.
- Antioxidant Power: Betalains help fight free radicals, which are responsible for dullness and premature aging. By incorporating them into soap, you give your skin a defensive boost.
- Vitamins and Minerals: Beetroot is high in Vitamin C (brightening), folate (cell repair), and potassium. These nutrients nourish the skin, aiding in a more even and glowing complexion.
- Natural Colorant: Beyond the health benefits, beetroot powder provides a soft, natural pink or reddish tone to the soap, eliminating the need for synthetic dyes.
H3: Safety First: Understanding Soap Making Methods
This guide focuses on the Melt and Pour method, which is the safest and most accessible way for beginners to make beetroot soap.
- Melt and Pour Method (Recommended): Uses pre-made soap base (like goat milk or glycerin) that has already undergone the caustic chemical reaction (saponification). You simply melt the base, add your inclusions (like beetroot), and pour into molds. This method is fast, safe, and guarantees a gentle, ready-to-use bar.
- Cold Process Method (Advanced): Requires handling lye (sodium hydroxide). While it offers ultimate control over oils, it involves significant safety risks and is not suitable for beginners. (For readers interested in learning this advanced technique, we recommend reading our “Beginner’s Guide to Cold Process Soap Making.”)
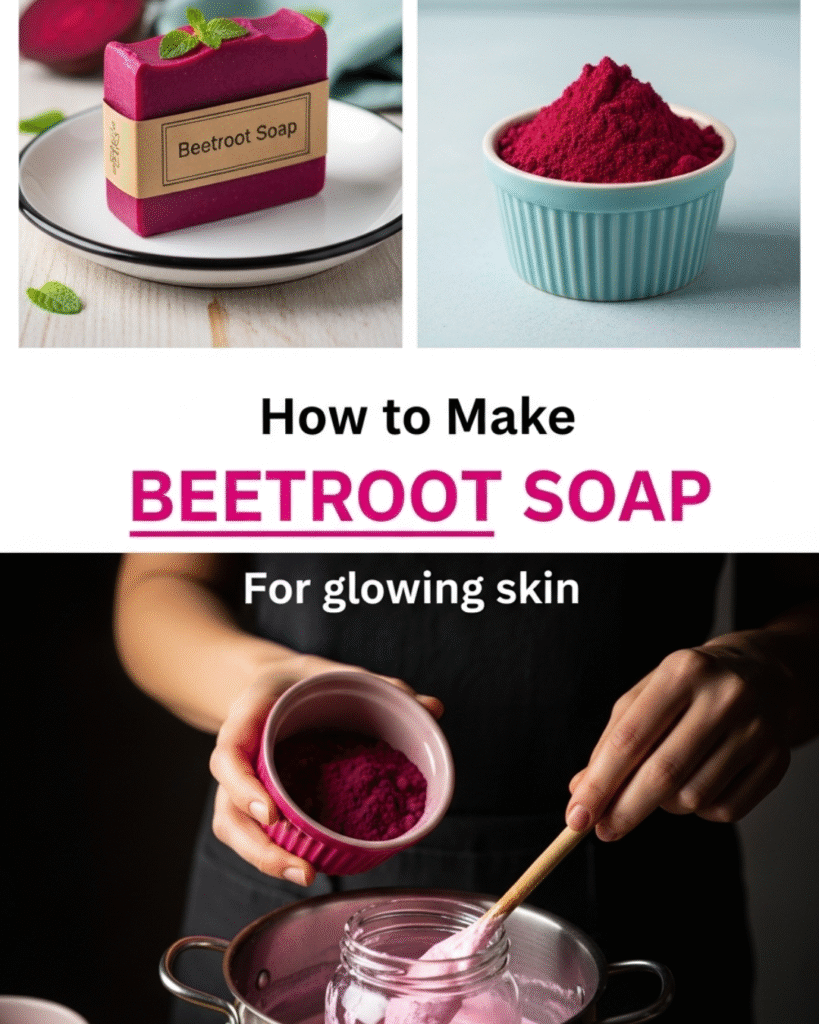
🎨 Step-by-Step Process: Making Beetroot Soap (Melt and Pour)
This recipe is designed to be simple, effective, and tailored to provide moisturization alongside the glow-boosting properties of beetroot.
Safety Considerations: While this is a Melt and Pour guide, always wear gloves, use a dedicated set of utensils for soap making, and work in a clean, ventilated area.
Core Methods: The Recipe and Ingredients
| Component | Measurement (Approximate) | Function in Soap |
| Clear Glycerin or Goat Milk Soap Base | 1 pound (450g) | The moisturizing, ready-to-use foundation. |
| Beetroot Powder | 1-2 Teaspoons | Natural colorant, antioxidant, and glow boost. |
| Carrier Oil (e.g., Sweet Almond/Jojoba) | 1 Tablespoon | Adds extra skin conditioning and moisture. |
| Essential Oil (e.g., Lavender/Geranium) | 10-15 Drops (optional) | Provides natural fragrance and aromatherapy benefits. |
| Rubbing Alcohol (in spray bottle) | As needed | Eliminates surface bubbles. |
Tools Required:
- Heat-safe Glass Measuring Cup or Bowl (for melting the base)
- Stirring Utensil (wooden or silicone spatula)
- Soap Molds (silicone molds are easiest for release)
- Small Whisk (for mixing powder)
- Microwave or Double Boiler
Step-by-Step Instructions:
- Prepare the Beetroot: In a small, separate bowl, combine the beetroot powder with the carrier oil (Sweet Almond or Jojoba). Whisk or stir until a smooth, clump-free paste (slurry) is formed. This prevents the powder from settling or creating speckles in the finished soap.
- Melt the Base: Cut the soap base into small, uniform 1-inch cubes. Place the cubes in the heat-safe container. Melt slowly in the microwave (30-second bursts, stirring between each) or over a double boiler until fully liquid. Do not let the base boil, as this can reduce lather and cause darkening.
- Incorporate Additives: Once the base is fully liquid, remove it from the heat. Stir in the prepared beetroot slurry. Stir gently but thoroughly until the vibrant color is evenly distributed throughout the base. Next, add the essential oil drops and stir again.
- Pour and Spray: Immediately and carefully pour the colored soap mixture into your molds. Once poured, lightly mist the surface of the soap with rubbing alcohol to pop any surface bubbles, ensuring a smooth, professional finish.
- Set and Unmold: Allow the soap to cool completely at room temperature (this can take 2-4 hours, depending on room temperature and mold size). Do not place in the freezer, as this can cause condensation. Once hard, gently pop the beetroot soap bars out of the molds.
🥕 Advanced Strategies: Customizing and Enhancing the Beetroot Effect
Once you are comfortable with the basic process, you can customize your beetroot soap to enhance specific benefits for glowing skin and achieve a more luxurious, high-end feel.
H3: Super-Fatted Enrichment and Textural Additions
- Boosting Moisture: To make your beetroot soap incredibly moisturizing (a technique known as super-fatting), increase the amount of rich, unrefined butter you add. Consider adding up to 2 tablespoons of Shea Butter or Cocoa Butter to the melted soap base along with the carrier oil. This is especially beneficial for dry or mature skin.
- Gentle Exfoliation: For a soft, daily exfoliant, add 1 teaspoon of fine Colloidal Oatmeal or finely ground rice powder during Step 3. Exfoliation helps remove dead skin cells, naturally revealing the glowing skin underneath.
H3: Layering and Swirling Techniques
To create a visually stunning bar that showcases the beetroot color, you can try layering or swirling:
- Layering: Divide your melted soap base in half. Color only one half with the beetroot powder. Pour the plain, uncolored base into the mold first. Wait for this layer to form a thin skin (about 10-15 minutes), then spritz with alcohol and pour the colored layer on top.
- Swirling: Color both halves (one with light beetroot, one left plain). Pour both colors into the mold simultaneously or pour one color and immediately use a skewer to gently swirl the top layer before it sets. Be careful not to over-swirl, which results in a muddy color.
🚨 Troubleshooting and Safety: Ensuring a Perfect Batch
The Melt and Pour method is low-risk, but a few common issues can affect the look and quality of your homemade beetroot soap.
Featured Snippet Potential: “How do I prevent my homemade beetroot soap from having speckles or a dull color?”
To prevent your homemade beetroot soap from having speckles and to ensure a vibrant, even color, you must first create a ‘slurry’ by thoroughly mixing the beetroot powder with a small amount of carrier oil (like Jojoba or Sweet Almond) before adding it to the melted soap base. This crucial step ensures the powder is fully dispersed and activated. To prevent a dull color, avoid overheating the soap base, as high temperatures can degrade the natural betalain pigments in the beetroot.
Common Soap Making Challenges
| Problem | Likely Cause | Solution & Prevention |
| “Sweating” or Dew Drops on Soap | Humidity or “glycerin dew” (common with high-glycerin bases). | Solution: Once cooled, wrap the soap tightly in cling film or plastic wrap immediately after unmolding. Store in a cool, dry place. |
| Color Fades After Curing | Excessive heat or light exposure during cooling. | Prevention: Allow the soap to cool and set away from direct sunlight and extreme temperatures. Beetroot color is light-sensitive; use dark storage. |
| Soap Base is Lumpy | Overheating or not stirring enough during the initial melt. | Prevention: Melt slowly in short bursts (30 seconds at a time) and stir gently. Do not let the base boil or scorch. |
(Internal Linking Opportunity: Check out our guide on “Extending the Shelf Life of Natural DIY Beauty Products.”)
✨ Maximizing Results: Storage, Use, and Next Level Glow
You’ve successfully learned how to make beetroot soap! Now focus on maintenance and incorporating it into a routine for sustained glowing skin.
Storage and Longevity
Because Melt and Pour soap already contains preservatives and does not require a lengthy cure time like cold process soap, it is ready to use immediately.
- Long-Term Storage: Store unwrapped bars in an airtight container in a cool, dark, dry place. Separate them with parchment paper to prevent sticking. Properly stored, the soap can last 1-2 years.
- In-Use Maintenance: Use a slatted soap dish that allows the bar to dry completely between uses. This significantly extends the life of the bar and prevents it from becoming soft or mushy.
Boosting the Glow Routine
To fully achieve the benefits of your beetroot soap for glowing skin, complement it with a natural moisturizer:
- Daily Hydration: Immediately after cleansing with your beetroot soap, apply a pure plant oil like Argan oil or Rosehip oil while the skin is still slightly damp. Rosehip oil, in particular, enhances the skin’s natural radiance and supports the work done by the beetroot.
- Gentle Consistency: Use the soap both morning and night, applying with gentle circular motions to maximize the mild cleansing and nutrient delivery.
✅ Conclusion: Embrace the Natural Glow
You have successfully unlocked the secret of how to make beetroot soap and harnessed the incredible, natural power of this root vegetable. By choosing the DIY route, you’ve ensured that your cleanser is rich in antioxidants, moisturizing, and free of harsh chemicals, all while achieving a beautiful, naturally colored bar that promotes truly glowing skin.
Embrace the satisfaction of using a product you created with your own hands! This simple act of self-care is a powerful step toward a more sustainable and radiant beauty routine.
What complementary natural ingredients, like charcoal or turmeric, will you experiment with in your next soap-making adventure?