
Are you ready to add a burst of tart, vibrant flavor to your garden with minimal effort? Learning how to plant and care for currants is an achievable venture that pays dividends in delicious berries perfect for jams and jellies. This comprehensive guide will empower you to transform a corner of your yard into a high-yielding, perennial berry patch. We’ll emphasize the connection with nature inherent in these hardy shrubs and provide the step-by-step guidance needed to nurture healthy, abundant currant bushes. Get ready to discover the joy of growing your own Ribes species!
🌳 Foundation First: Choosing the Right Currant Variety and Location
Successful currant growing starts with variety selection and proper placement. Currants (Ribes species) are incredibly hardy but have specific needs concerning climate and sun exposure.
H3: Building Confidence with Basic Concepts: Types of Currants
There are three main types of currants, each offering unique flavor profiles and growth habits. Knowing these will build confidence in selecting the right variety for your regional variations.
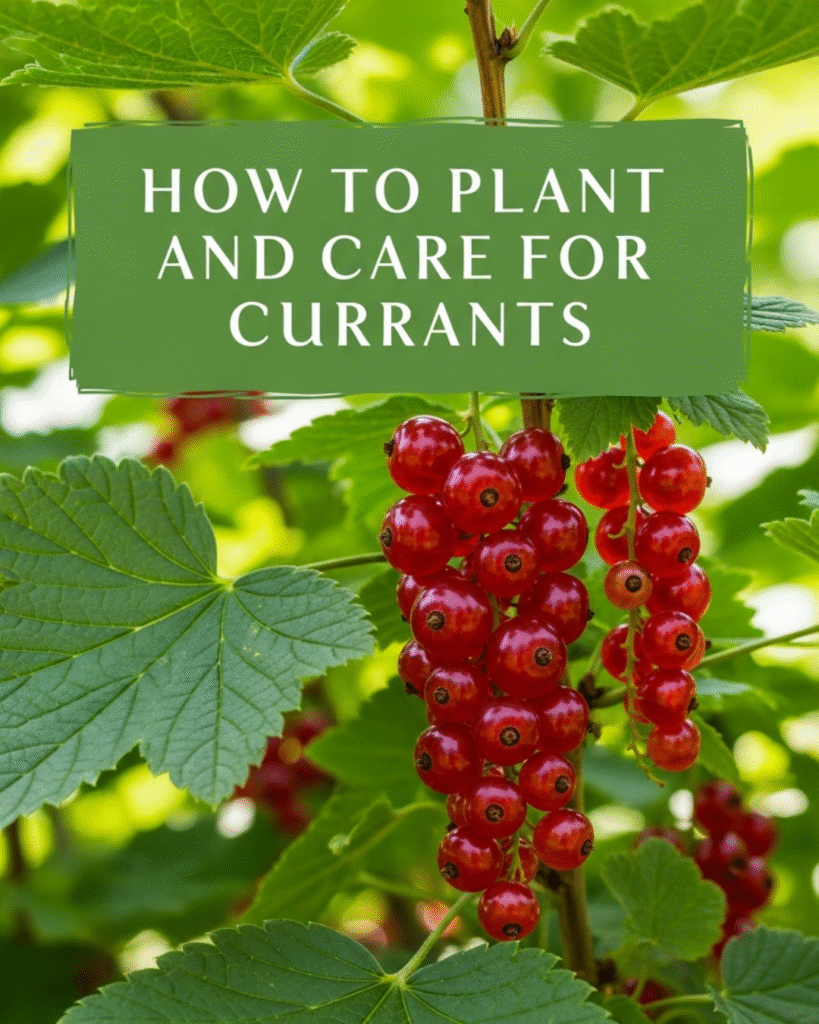
- Red Currants (Ribes rubrum): Known for their tart flavor and suitability for jellies and sauces. They typically produce fruit in long, beautiful clusters. Examples: ‘Red Lake,’ ‘Jonkheer Van Tets.’
- Black Currants (Ribes nigrum): Prized for their deep, musky flavor and extremely high Vitamin C content. They prefer cooler, more northern climates and are often used in juices and cordials.
- White Currants (Ribes sativum): A less common, sweeter variety of the red currant, with pale, translucent fruit perfect for fresh eating.
H3: Addressing Common Concerns: Sunlight and Soil
Currants thrive in conditions that differ slightly from most sun-loving berries.
- Sunlight Requirements: Currants prefer partial shade—especially in regions with hot summers (USDA Zones 6 and above). Too much direct, intense afternoon sun can scorch the leaves and stunt fruit development. A spot with $4-6$ hours of morning sun is ideal.
- Soil and pH: These shrubs thrive in cool, moist, organic-rich soil. They tolerate a wide $\text{pH}$ range but prefer soil that is slightly acidic to neutral ( $\text{pH}$ $5.5$ to $7.0$). Ensure the soil drains well; currants hate having “wet feet.”
- Encouraging Reassurance for Beginners: Currants are extremely cold-hardy (down to Zone $3$ or $2$), making them a fantastic, low-maintenance choice for gardeners in northern climates.
🪴 Section 2: Core Methods: How to Plant Currant Bushes Correctly
Planting currants correctly ensures a strong, productive shrub for two decades or more. Timing and spacing are crucial for maximizing light and airflow.
Step-by-Step Guidance: Planting Bare-Root Currants
Currants are typically sold as dormant, bare-root plants in late winter or early spring. This is the optimal time for planting.
- Soak the Roots (Actionable Language): Before planting, soak the bare roots in a bucket of water for 3 to 6 hours to rehydrate them.
- Prepare the Hole: Dig a hole twice as wide and slightly deeper than the root mass. Amend the removed soil generously with well-rotted compost or leaf mold to boost organic matter.
- Plant Deeply: Place the plant in the hole. Planting tip: Set the root ball $1$ to $2$ inches deeper than it was in the nursery. This encourages the formation of new stems from the base, which is vital for maximum fruit production.
- Backfill and Water: Gently backfill the hole, firming the soil around the roots to eliminate air pockets. Water deeply immediately after planting.
- Initial Pruning (Crucial Shortcut): Immediately prune all canes back to just $4$ to $6$ inches above the soil line. This seemingly drastic step is a shortcut that forces the plant to focus energy on developing a strong root system and multiple new canes from the base, setting the stage for abundant future harvests.
H4: Spacing and Timing Considerations
- Spacing: Space plants $3$ to $5$ feet apart. Good air circulation is essential for preventing fungal diseases like powdery mildew, a critical safety consideration in plant health.
- Timing: Plant as soon as the soil is workable in early spring. Avoid planting in the heat of summer.
💧 Section 3: The Secret to Abundant Berries: Pruning and Feeding
The secret to consistently large yields lies not in complex feeding schedules, but in strategic annual pruning that encourages new growth, where most berries are produced.
H3: Strategic Pruning for Maximum Yield
Currants bear most of their fruit on wood that is two and three years old. The goal of pruning is to maintain a balance of younger canes and remove old, unproductive wood.
- When to Prune: Prune annually during the dormant season (late winter or very early spring, before buds break).
- The Three-Year Rotation: Aim to maintain 9 to 12 strong, healthy canes of varying ages on each bush.
- Year 1-2: Leave new, bright canes (1 and 2 years old) untouched.
- Year 3: Selectively remove all canes that are four years old or older (these look thick, dark, and less vigorous) right down to the ground.
- Year 4 and beyond: Remove the oldest third of the bush each year, along with any weak, crossing, or low-growing canes. This systematic removal guarantees productive new growth annually.
H3: Practical Fertilization Guidance
Currants are not heavy feeders but benefit from regular, moderate nutrition.
- Annual Feed: Apply a balanced organic fertilizer (e.g., $10-10-10$ or similar organic mix) in early spring just as growth begins.
- Mulching (The Best Pro Tip): Apply a $3$- to $4$-inch layer of organic mulch (wood chips, straw, or compost) around the base of the bush, keeping it a few inches away from the crown. This creative solution keeps the soil cool and moist, feeds the plant as it breaks down, and suppresses weeds—critical for the shallow root system of currants.
🐛 Section 4: Troubleshooting and Pest Management
While tough, currants are susceptible to a few common issues. Knowledge of these challenges and their solutions ensures you can nurture your plants without major setbacks.
Featured Snippet Potential: “What causes currant leaves to turn yellow?”
Currant leaves commonly turn yellow due to nutrient deficiency (especially iron or magnesium, which occurs in high $\text{pH}$ soil), or due to insufficient moisture during hot, dry weather. To correct this, check the soil $\text{pH}$ (currants prefer slightly acidic soil) and apply chelated iron or magnesium sulfate if needed. Additionally, ensure deep, consistent watering, and apply a thick layer of organic mulch to maintain soil coolness and moisture.
Practical Troubleshooting Tips (Gardening Focus)
- Problem: Powdery Mildew: White, dusty patches appear on the leaves, especially in warm, humid weather with poor air circulation.
- Obstacle: Common in crowded or unpruned plants.
- Solution: Preventive measures: Prune annually to improve airflow. If an outbreak occurs, apply a baking soda solution (1 teaspoon per quart of water with a dash of liquid soap) or a commercial fungicide.
- Problem: Currant Fruit Worm: Worms appear in the berries, causing them to ripen prematurely or drop.
- Solution: Alternative approaches: Hand-pick and destroy affected fruit immediately. For severe infestations, use a dormant oil spray in early spring before buds open, or apply Bacillus thuringiensis ($\text{Bt}$) at the time of fruit set.
- Problem: Poor Fruit Set: Lots of flowers, but few berries.
- Obstacle: Likely due to a late frost damaging the flowers, or a lack of pollinators.
- Solution: Protect early blooms with a row cover if frost is predicted. Encourage ecosystem benefits by planting bee-attracting flowers nearby.
🚀 Section 5: Maximizing Results: Harvesting and Propagation
The reward for learning how to plant and care for currants is a spectacular harvest. These next-level tips help you maximize the return and expand your patch.
- The Right Time to Harvest: Red and white currants are usually ready for harvest when the entire cluster is fully colored and the fruit is firm but easily pulled from the stem. Black currants are typically harvested slightly later when they are fully dark and soft. Taste is the best indicator!
- Harvesting Tip (Efficiency): Harvest red and white currants by picking the entire string or “strig” of berries rather than trying to pick individual berries. This is a crucial cost-saving benefit in time and effort.
- Propagation (Next Level Tip): Currants are incredibly easy to propagate from hardwood cuttings, making it simple to expand your patch for little to no cost. In late fall or early winter, take $6$- to $8$-inch cuttings from dormant $1$-year-old wood. Dip the base in rooting hormone and plant them in a nursery bed or pot. You’ll inspire continued growth and learning by growing new bushes!
- Long-Term Considerations: With proper care and annual pruning, currant bushes can remain productive for 20 years or more, providing a sustainable lifestyle change in your perennial food supply.
✅ Conclusion: Your Capability to Grow Currants
You are now equipped with the ultimate knowledge on how to plant and care for currants, from selecting the right variety to mastering the essential art of pruning. By implementing these achievable methods—providing partial shade, ensuring good drainage, and maintaining a $3$-year pruning rotation—you are set for decades of tart, delicious harvests.
Embrace the reward of this perennial fruit. Your capability to succeed in nurturing these resilient shrubs will quickly be apparent.
Will you start by applying the Crucial Initial Pruning to your new bare-root plant, or will you focus on creating a rich, organic Mulch Layer to keep the roots cool?