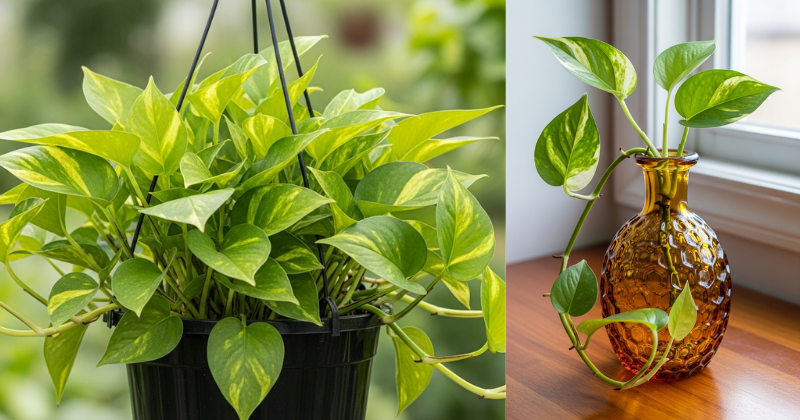
Propagating pothos is one of gardening’s most rewarding rituals, a quiet act of multiplication that transforms a single plant into an entire collection. If you’ve ever gazed at your pothos and wondered how to share its cascading beauty with friends or fill your home with more of its vibrant presence, you’re about to discover that this process is far simpler and more magical than you might imagine. This trailing companion, with its heart-shaped leaves and forgiving nature, practically begs to be propagated, offering you the chance to witness the miracle of root formation and new growth firsthand.
In this guide, we’ll walk through the gentle art of pothos propagation, from selecting the perfect cutting to watching those first delicate roots emerge. Whether you’re a complete beginner or someone who’s killed every plant they’ve touched, pothos propagation offers a fresh start and a genuine opportunity to succeed. By the end of this journey, you’ll have the confidence and knowledge to create an entire indoor jungle from a single mother plant.
Understanding Your Pothos: The Foundation of Successful Propagation
Before we dive into the practical steps, let’s develop a deeper appreciation for what makes pothos such an exceptional candidate for propagation. This plant, scientifically known as Epipremnum aureum, carries within its stems an almost supernatural ability to generate new roots from virtually any node. Each node is a point of potential, a place where leaves emerge and where dormant root cells wait patiently for their moment to awaken.
The beauty of pothos propagation lies in its forgiving nature. Unlike finicky plants that demand precise conditions and specific timing, pothos adapts to your schedule and your environment. It thrives in bright indirect light but tolerates lower light conditions. It forgives forgotten waterings and doesn’t require expensive rooting hormones or specialized equipment. This resilience makes it the perfect teacher for anyone learning the fundamentals of plant propagation.
Recognizing the Anatomy of Success
Learning to identify the key parts of your pothos stem is essential. The nodes are small bumps along the stem where leaves attach, and these are your propagation gold mines. Between each node, you’ll find the internode, the smooth section of stem that connects them. When you take a cutting, you want at least one node, though two or three is ideal. From these nodes, roots will emerge when exposed to water or soil, transforming a simple cutting into an independent plant.
Look closely at your mother plant and you’ll notice aerial roots, small brown nubs that sometimes appear at the nodes. These are preliminary root structures that make propagation even easier, as they’re already primed to develop into full root systems.
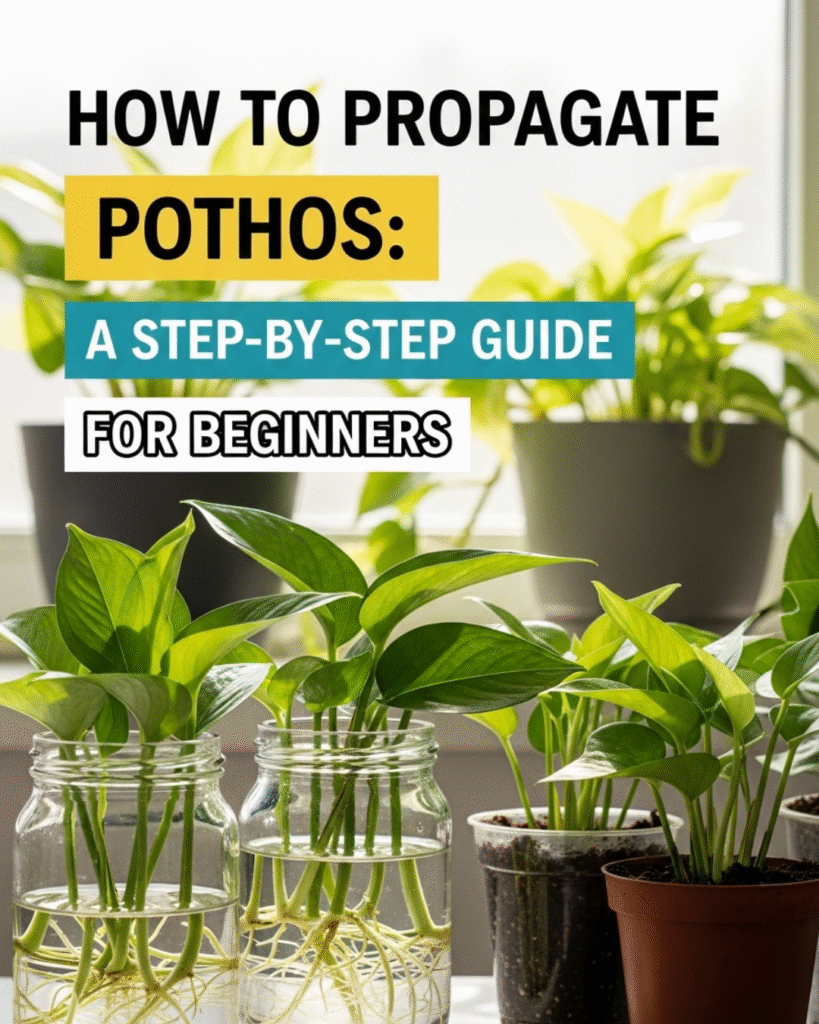
The Water Propagation Method: Watching Magic Unfold
Water propagation is perhaps the most enchanting way to multiply your pothos because it allows you to witness the entire root development process. There’s something almost meditative about checking your cuttings each day, observing the gradual emergence of white roots that stretch and curl through clear water like underwater dancers.
Begin by selecting healthy stems from your mother plant. Look for sections with vibrant green leaves and strong growth, avoiding any yellowing or damaged portions. Using clean, sharp scissors or pruning shears, make your cut about a quarter inch below a node. The cut should be clean and angled, which increases the surface area for root development. Each cutting should include two to four leaves and at least one or two nodes below the lowest leaf.
Remove any leaves that would sit below the waterline, as submerged foliage will rot and contaminate your propagation vessel. Place your cuttings in a clear glass or jar filled with room temperature water. The clarity of the container isn’t just aesthetic; it allows you to monitor root development and water quality without disturbing the cuttings.
Creating the Perfect Environment
Position your propagation vessel in bright, indirect light. A spot near an east or north-facing window works beautifully, providing gentle illumination without the harsh intensity that could stress your cuttings. Direct sunlight can overheat the water and damage delicate forming roots, so filtered light is your ally here.
Change the water every three to five days, or whenever it begins to look cloudy. Fresh water provides oxygen and prevents bacterial growth that could inhibit root development. Room temperature water is ideal, as cold water can shock the cutting while warm water depletes oxygen too quickly.
Within one to two weeks, you’ll notice the first signs of root formation. Tiny white bumps will appear at the nodes, gradually extending into thread-like roots. These roots will continue growing, becoming longer and more complex over the following weeks. Once your roots reach two to three inches in length, your cutting is ready for its permanent home in soil.
Soil Propagation: The Direct Path to Permanence
While water propagation offers visual drama, soil propagation creates a more seamless transition for your new plants. This method skips the adjustment period that water-rooted cuttings sometimes experience when moved to soil, allowing roots to develop in the medium where they’ll ultimately live.
Prepare your cuttings using the same technique described for water propagation. The difference lies in what happens next. Fill small pots with a well-draining potting mix, ideally one formulated for houseplants or created by mixing standard potting soil with perlite or orchid bark for improved drainage. Pothos despises soggy soil, so this drainage component is crucial.
Make a small hole in the soil with your finger or a pencil, then gently insert your cutting so that at least one node is buried beneath the surface. Firm the soil around the stem to provide stability while being careful not to damage the delicate cutting. Water thoroughly until moisture drains from the bottom of the pot, then place the pot in the same bright, indirect light you’d use for water propagation.
Maintaining Moisture Without Drowning
The key to successful soil propagation is maintaining consistent moisture without creating waterlogged conditions. Check the soil every few days, watering when the top inch feels dry to the touch. You might create a mini greenhouse effect by placing a clear plastic bag loosely over the cutting, which traps humidity and encourages root growth. Remove the bag for a few hours every couple of days to prevent mold, and take it off completely once you see new growth emerging.
New leaf development is your signal that roots have established themselves successfully. This typically occurs within three to four weeks, though patience is essential as some cuttings take longer than others.
Advanced Techniques: Maximizing Your Propagation Success
Once you’ve mastered basic propagation, you can explore techniques that increase your success rate and create more robust plants. Consider propagating multiple cuttings in the same container, creating fuller plants more quickly. When doing this, ensure each cutting has adequate space and that the container is large enough to accommodate multiple root systems without crowding.
Timing your propagation efforts can also influence success. Spring and summer, when pothos experiences its most active growth phase, typically yield faster root development and stronger plants. However, pothos is forgiving enough that propagation is possible year-round with proper care.
For particularly stubborn cuttings or if you want to accelerate root development, rooting hormone can be beneficial though not necessary. This powder or gel contains auxins that stimulate root formation. Simply dip the cut end of your stem in the hormone before placing it in water or soil. While pothos propagates readily without this aid, rooting hormone can provide extra insurance for beginners or reduce rooting time by several days.
Troubleshooting Common Challenges: When Propagation Needs Guidance
Even with forgiving pothos, occasional challenges arise. If your water-propagated cutting develops mushy, brown stems instead of healthy roots, bacterial rot has likely set in. Remove the affected portion by cutting above it, change to fresh water, and ensure your vessel is thoroughly cleaned. Sometimes starting with a new cutting from a healthier section of the mother plant is the best solution.
Cuttings that refuse to root after several weeks may lack sufficient light or warmth. Pothos roots best in temperatures between 65-80°F, so cold environments can significantly slow the process. Moving your propagation to a warmer location or providing gentle bottom heat can jumpstart reluctant cuttings.
Yellowing leaves on cuttings are typically normal as the plant redirects energy to root formation. However, if all leaves yellow and drop, your cutting may have been too small or lacked sufficient stored energy. Always select cuttings with at least two healthy leaves and substantial stem length.
For soil-propagated cuttings that wilt dramatically, you’re likely experiencing either too much or too little water. Feel the soil deeply and adjust your watering schedule accordingly. Remember that newly propagated cuttings need more consistent moisture than established plants but still require good drainage and should never sit in waterlogged soil.
Building Your Collection: From Single Cutting to Indoor Jungle
The true joy of pothos propagation reveals itself over time as you transform one plant into many. Share cuttings with friends, creating living connections that grow alongside your relationships. Create themed displays by propagating variegated varieties alongside solid green ones, watching how each develops its unique personality.
Consider propagating with purpose by selecting cuttings from different parts of your mother plant. Sections from the growing tips often root fastest and produce compact, bushy growth, while cuttings from older, trailing sections create long, dramatic cascades more quickly. By combining these different cutting types in a single pot, you create dimension and visual interest.
As your confidence grows, experiment with propagating other members of the pothos family or similar plants like philodendrons. The skills you’ve developed transfer beautifully to other easy-to-propagate species, opening up an entire world of plant multiplication.
Conclusion: The Endless Cycle of Growth and Sharing
Propagating pothos is more than a gardening technique; it’s an initiation into the endless cycle of growth, sharing, and renewal that makes plant parenthood so deeply satisfying. Each cutting you take is an act of faith in nature’s resilience and your own growing abilities. Each root that emerges is proof that you’re capable of nurturing life and multiplying beauty.
You now possess the knowledge to transform a single pothos into an abundant collection, to share the joy of this remarkable plant with everyone in your life, and to witness the quiet miracle of root formation whenever you need a reminder of nature’s generosity. So select your first cutting with intention, place it in water or soil with care, and prepare to be amazed by what unfolds. Your pothos is ready to multiply, and you’re ready to guide that transformation. The only question remaining is: how many new plants will you create?