
Learn how to seal air dry clay with our step-by-step guide for beginners. Discover the best sealants to protect your DIY clay projects from moisture and dust.
Have you ever spent hours meticulously sculpting a beautiful trinket dish or a custom figurine, only to watch it become brittle or dusty just a few weeks later? It is a heartbreaking experience for any crafter, but it doesn’t have to be your reality. Imagine giving your handmade creations a professional, glass-like finish that not only enhances their color but also protects them from the elements for years to come. Today, you are going to discover how to seal air dry clay using simple techniques that transform your hobbyist pieces into durable works of art.
By mastering the art of the finish, you will gain the confidence to create gifts and home decor that actually last. This guide offers achievable, step-by-step guidance to help you navigate the world of varnishes, glazes, and resins with ease. You have the capability to protect your hard work and unlock a new level of craftsmanship. Get ready to discover how the right sealant can achieve a total breakthrough for your creative projects!
Foundation: Why Sealing is a Must for Beginners
Before we pick up a brush, let’s build your confidence with the basic concepts of clay preservation. Understanding the “why” behind the process will help you appreciate why learning how to seal air dry clay is the most important part of the sculpting process.
The Vulnerability of Air Dry Clay
Unlike traditional ceramic clay that is fired in a kiln, air dry clay remains porous even after it is completely hard. This means it can absorb moisture from the air, which can lead to softening, mold growth, or cracking over time. Sealing creates an impermeable barrier that locks out humidity and locks in the structural integrity of your piece.
Types of Finishes
When you decide to seal your work, you have several aesthetic choices:
- Glossy: Gives a shiny, ceramic-like look that makes colors pop.
- Matte: Provides protection without the shine, perfect for a natural or modern look.
- Satin: A middle-ground finish that offers a soft, subtle glow.
Reassurance for New Crafters
If you are worried about “ruining” your sculpture with a messy varnish, don’t be! You are doing a great job by taking this extra step to ensure longevity. With the right tools and a bit of patience, the sealing process is incredibly forgiving. You have everything you need to succeed right in your craft kit.
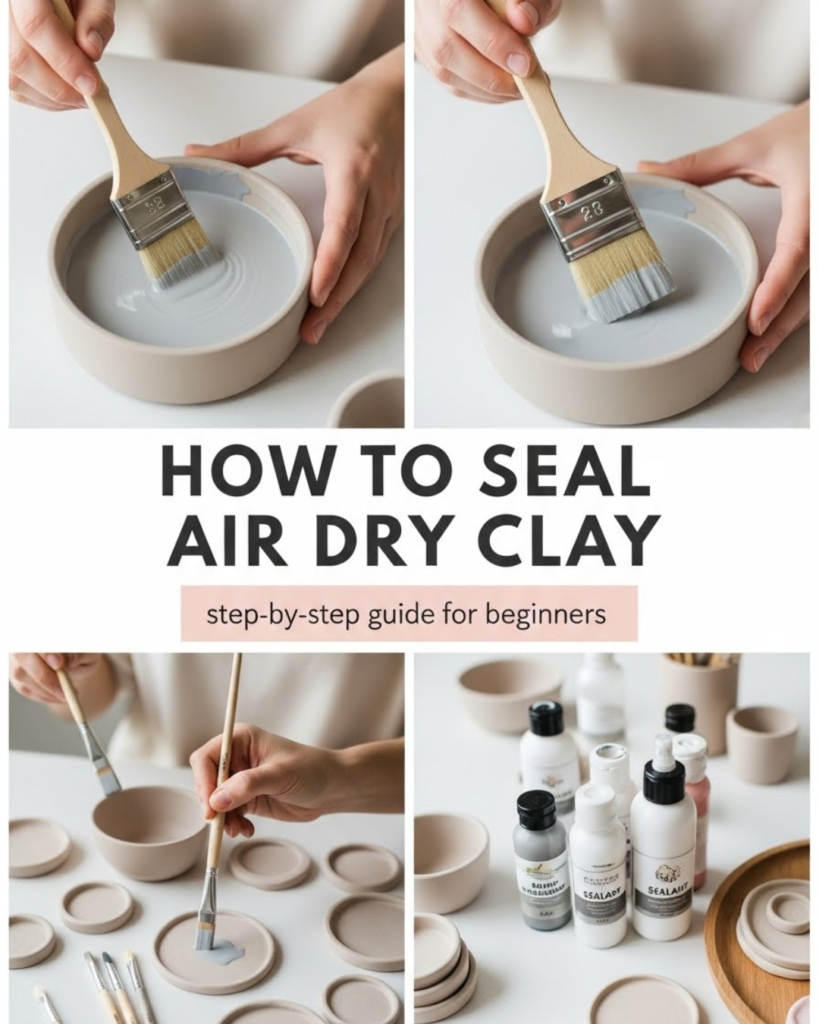
Step-by-Step Process: Sealing Your Masterpiece
Ready to give your project that final glow? Follow these manageable steps to ensure a smooth, professional finish. This core method is the gold standard for those learning how to seal air dry clay.
1. Preparation is Key
- Wait for Total Dryness: Never seal damp clay. Wait at least 24–72 hours depending on the thickness of your piece.
- Sanding: Use a fine-grit sandpaper to smooth out any bumps or fingerprints.
- Cleaning: Use a soft, dry brush to remove every speck of dust. If dust remains, it will be trapped forever under the sealant!
2. Choosing Your Sealant
- Mod Podge: An affordable, beginner-friendly option for decorative items.
- Acrylic Varnish: Highly durable and available in various finishes.
- Polyurethane: Provides a very hard, water-resistant coat.
3. The Application Method
- Step 1: Stir your sealant gently; never shake it, as this creates air bubbles that will mar your finish.
- Step 2: Use a soft-bristle synthetic brush to apply a thin, even layer. Start from the top and work your way down.
- Step 3: Let the first coat dry completely (usually 30–60 minutes).
- Step 4: Apply a second coat for maximum protection.
4. Timing and Environment
Work in a well-ventilated, dust-free area. High humidity can make sealants stay tacky for longer, so try to choose a dry day for your finishing work.
- Internal Link: If you’re working at your kitchen table, make sure to Make Your Own Non Toxic Cleaning Wipes to quickly clear your workspace afterward!
Advanced Strategies: Pro Tips for a High-End Finish
Once you have mastered the basic brush-on method, use these expert-level insights to customize your approach and achieve even better results.
The “Dipping” Technique
For small items like jewelry or beads, you can achieve a perfectly smooth finish by dipping the item directly into the sealant and hanging it to dry. This eliminates brush strokes entirely and ensures every nook and cranny is covered.
Using UV Resin
For a thick, ultra-glossy finish that looks like real glass, many advanced crafters use UV resin. It cures in minutes under a UV light and provides the highest level of durability.
- Internal Link: While waiting for your resin to cure, take a break and discover the Turmeric Water Benefits to keep your creative energy high.
Featured Snippet: Can air dry clay be made waterproof?
While you can learn how to seal air dry clay to make it water-resistant, it is rarely 100% waterproof. Sealants like polyurethane or epoxy resin offer the best protection against splashes, but air dry clay should never be submerged in water or used for items that hold liquid (like a functional vase) unless you use a specialized waterproof glass insert.
Troubleshooting: Common Challenges and Solutions
Even with the best intentions, DIY projects can face obstacles. Here is how to handle them with an empowering mindset:
- “My sealant is cloudy”: This usually happens if the coat was applied too thick or if the environment was too humid.
- Solution: Let it dry completely; often the cloudiness disappears. If not, sand lightly and apply a very thin, fresh coat.
- “There are bubbles in the finish”: You likely shook the bottle or used a brush that was too stiff.
- Fix: Pop bubbles with a needle while the sealant is wet. If it’s already dry, sand the bubbles down and re-coat.
- “The sealant feels sticky/tacky”:
- Tip: Some sealants take days to “cure” fully. Move the piece to a warmer, drier room. If it stays tacky, you may need to apply a clear acrylic spray sealer over the top to “lock” it in.
- Internal Link: To keep your hands clean during the messy sanding phase, you might find our guide on DIY Shower Melts helpful for a relaxing post-craft scrub.
Maximizing Results: Maintenance and Longevity
Now that you know how to seal air dry clay, let’s build upon that success by looking at how to care for your finished pieces over the long term.
Proper Display
Even sealed clay can fade if left in direct, harsh sunlight for years. Keep your prized sculptures in a shaded area of the room to maintain their vibrant colors.
Cleaning Sealed Clay
Dust your pieces regularly with a soft microfiber cloth. If a deeper clean is needed, a slightly damp cloth is fine, but avoid harsh chemical cleaners that could strip the varnish.
- Internal Link: For those who love keeping a pristine home for their crafts, check out the DIY Toilet Cleaner Pods for a Sparkling Bathroom to keep your entire sanctuary fresh.
Conclusion: Achieve the Professional Look You Deserve
You have now discovered why it is so beneficial to learn how to seal air dry clay and, more importantly, you have the achievable steps to do it yourself. You have moved from a beginner sculptor to an empowered maker who understands the importance of the final touch. By following these methods—proper preparation, thin layers, and the right sealant choice—you have achieved a strategy for creating lasting memories and beautiful decor.
The journey to artistic mastery is a rewarding path of trial and error. We encourage you to seal your latest project this weekend! You are more than capable of achieving a high-quality, professional-grade finish using these simple, effective tools.