Starting seeds indoors or reusing potting mix often leads to frustrating setbacks like damping-off disease and fungus gnats. Learning how to sterilize soil easy method is a foundational step that virtually guarantees healthier seedlings and prevents the spread of pathogens. This achievable, step-by-step guidance will empower you to transform old soil and build confidence in your gardening skills. We’ll show you the simplest, most effective methods to discover the benefits of sterile soil, emphasizing safety considerations and the satisfaction of completion of a vital gardening task.
🔬 Foundation First: Why Sterilization is Essential
Sterilizing soil might sound like a complicated laboratory procedure, but it’s a necessary DIY step that significantly increases your success rate, especially when starting seeds or dealing with troubled houseplants.
H3: Building Confidence with Basic Concepts: Pests and Pathogens
What exactly are we trying to eliminate when we learn how to sterilize soil easy method?
- Pests: This includes the eggs or pupae of common houseplant nuisances like fungus gnats (which thrive in damp soil), thrips, and whiteflies.
- Pathogens: This is the most critical threat. Soil can harbor fungal diseases like Pythium and Rhizoctonia, which cause damping-off—a condition where healthy seedlings suddenly collapse and die at the base.
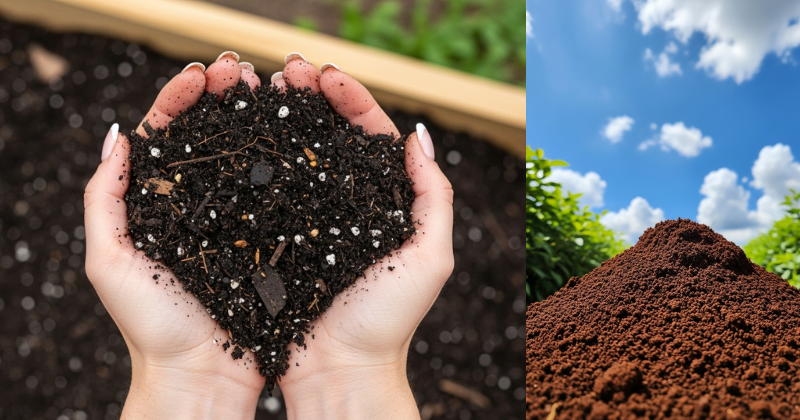
- Encouraging Reassurance for Beginners: Sterilization is not about creating a completely lifeless medium; it’s about controlling the bad actors. It allows you to nurture delicate new growth in a safe environment.
H3: Addressing Common Concerns: When to Sterilize
You don’t need to sterilize every bag of new potting mix, but there are crucial times when this step is non-negotiable.
| Scenario | Recommendation | Why Sterilization is Needed |
| Reusing Potting Mix | Mandatory | Likely contains accumulated pest eggs, fungus spores, or disease from past plants. |
| Starting Seeds Indoors | Highly Recommended | Seeds and tender seedlings are highly vulnerable to damping-off disease. |
| Using Garden Soil | Mandatory | Garden soil contains dormant weed seeds and potentially harmful outdoor pathogens. |
| New, Sealed Bag of Mix | Generally unnecessary | High-quality, commercial potting mixes are usually sold sterilized. |
🔥 Section 2: Core Methods: The Oven Sterilization Technique
The oven method is the most reliable and easiest way to achieve the precise temperature required to kill pathogens. This is the simplest answer to how to sterilize soil easy method.
Step-by-Step Guidance: The Oven Method
This process focuses on heat to kill pathogens, making it a highly effective and achievable approach.
- Preparation (Actionable Language): Slightly dampen your soil. It should be uniformly moist, like a wrung-out sponge, but not dripping wet. If it’s too dry, the heat won’t penetrate effectively. If it’s too wet, it will simply steam without reaching the necessary internal temperature.
- Container Setup (Safety Consideration): Place the damp soil into a large, oven-safe container (like a roasting pan) or shallow foil pans. The soil layer should be no deeper than 4 inches to ensure even heating. Cover the pan tightly with aluminum foil.
- The Baking Process: Place a meat thermometer or an oven-safe digital thermometer into the center of the soil mass, pushing it through the foil. Preheat your oven to a low temperature, between $180^\circ\text{F}$ and $200^\circ\text{F}$ ($82^\circ\text{C}$ to $93^\circ\text{C}$).
- Heating and Timing: Once the internal soil temperature reaches $180^\circ\text{F}$ ($82^\circ\text{C}$), start a timer for 30 minutes. Maintain this temperature range (adjusting the oven dial if necessary) for the full half hour. This time/temperature combination is essential for killing most harmful pathogens without destroying beneficial soil chemistry.
- Cooling and Aeration: Turn the oven off and allow the soil to cool completely while still covered. Once cool, remove the foil and let the soil sit uncovered for several hours or even overnight. This step is critical for allowing any byproducts of the heating process to dissipate.
H4: Practical Tips and Shortcuts for Smell Control
One common issue with the oven method is the unpleasant odor of heating soil.
- Shortcut: Place 1-2 teaspoons of ground cinnamon on top of the soil before covering it with foil. The cinnamon’s scent will help mask the earthy odor, providing a small but welcome relief during this DIY process.
- Safety Tip: Do not use high heat. If you bake the soil above $200^\circ\text{F}$ ($93^\circ\text{C}$), you risk burning off organic matter, which can leave behind toxic residues harmful to plants.
🌞 Section 3: Advanced Strategies: Solar and Microwave Methods
For gardeners looking for alternatives to the oven or dealing with different soil volumes, these advanced strategies offer different approaches to sterilization.
H3: Creative Solutions: Solarization for Large Batches
If you have large volumes of garden soil or compost to sterilize, especially during hot seasonal considerations, solarization is a viable, cost-saving option.
- Method: Spread the soil in a thin layer (no more than 6 inches deep) on a clean, sunny surface. Thoroughly dampen the soil.
- Covering: Cover the entire area tightly with clear plastic sheeting (4-6 mil thick). Secure the edges with rocks or soil to create an airtight seal.
- Timing: The sun’s heat will trap moisture and raise the internal temperature. In hot regions (where daytime temps exceed $90^\circ\text{F}$), leave the plastic for 4-6 weeks during the height of summer. This technique naturally raises the temperature to high-kill zones ($140^\circ\text{F}$ to $160^\circ\text{F}$ in the top layer), effectively killing weed seeds and surface pathogens.
H3: Pro Tips: The Microwave Method for Small Batches
The microwave is a fast, alternative approach suitable only for very small amounts of soil (a few cups) needed for immediate seed starting.
- Method: Place 2-3 cups of slightly moist soil into a clean, microwave-safe plastic bag or container. Do not seal the container tightly; leave a vent hole.
- Heating: Microwave on high for 90 seconds per 2 pounds of soil, or until steam is visible.
- Caution: Because microwave heating is uneven, you must ensure the soil reaches the kill temperature ($180^\circ\text{F}$) using a thermometer. Let it cool completely before use.
🚧 Section 4: Troubleshooting and Common Challenges
Even when following the steps for how to sterilize soil easy method, issues can arise, particularly related to recontamination.
Featured Snippet Potential: “How long should I wait after sterilizing soil before planting?”
You should wait a minimum of 24 hours after sterilizing soil before planting to allow the soil to cool completely and for any temporary residues or gases caused by the heating process to dissipate. Furthermore, it’s beneficial to let the soil breathe for a day or two to re-absorb natural air and moisture, which encourages beneficial microorganisms to begin recolonizing the medium.
Practical Troubleshooting Tips (Gardening Focus)
- Problem: Fungus Gnats return almost immediately after sterilization.
- Obstacle: Recontamination, often through tools or using unsterilized water.
- Solution: Preventive measures: Always use clean, sterilized containers and tools (wipe pots with a $10\%$ bleach solution) when handling the treated soil. Avoid using standing water from outdoor barrels, which can harbor pests.
- Problem: Seedlings are still failing due to damping-off.
- Obstacle: The soil was not heated to the full $180^\circ\text{F}$ or held there for the full 30 minutes.
- Solution: Check your thermometer’s accuracy and repeat the oven sterilization process, ensuring the internal temperature is maintained precisely. Poor air circulation in the seed-starting area is also a common culprit; ensure adequate air movement.
- Problem: The texture of the sterilized soil seems too dense.
- Solution: Heating can sometimes affect the structure. Before planting, mix in fresh perlite or vermiculite (alternative approaches) to enhance aeration and drainage. (Internal Linking Opportunity: Read our guide on “Amending Potting Soil for Optimal Drainage.”)
🌱 Section 5: Maximizing Results: Post-Sterilization Care
Sterilized soil is a blank canvas. These next-level tips ensure you maintain the clean environment and inspire continued growth and learning.
- Maintenance and Long-Term Considerations: Sterilized soil is temporarily devoid of both bad and good bacteria. To maximize plant health and build upon basic success, reintroduce beneficial microorganisms.
- Complementary Strategies (Reintroducing Life): After the soil has cooled and aerated, mix in a small amount of fresh, high-quality, worm castings or a microbial inoculant (available at garden centers). These natural additions restore the healthy microbial ecosystem benefits that aid nutrient absorption and plant immunity.
- Storage: Only sterilize the amount of soil you need immediately. If you must store sterilized soil, place it in a clean, airtight container to prevent recontamination from airborne spores or pests. Label the container and use it within 6-12 months.
✅ Conclusion: Your Capability to Nurture
You have successfully learned how to sterilize soil easy method using accessible home techniques. By mastering the heat-and-hold method, you eliminate common disease vectors, giving your fragile seedlings and houseplants the best possible chance to flourish.
Embrace this foundational knowledge. The effort you put into cleaning your soil guarantees a healthier, more rewarding experience as you nurture your garden.
Which sterilization method—the precise Oven Method or the Cost-Saving Solarization—will you implement first to unlock a new season of healthy growth?