
Are you tired of messy jar scrubs that spill, clump, and leave your shower floor slippery? If you’re craving skin that feels baby-soft, deeply moisturized, and utterly pampered, you need to discover the magic of SUGAR SCRUB BARS. These solid, single-use wonders combine exfoliation and intense hydration into one convenient, zero-mess bar. Making your own SUGAR SCRUB BARS is an achievable and rewarding DIY wellness topic that allows you to customize approach to your exact skin needs while enjoying significant cost-saving benefits. Get ready to transform your shower routine and unlock the secret to smoother, healthier skin with this easy recipe.
🛁 Section 1: Foundation First: Why Solid Bars Are Better
To appreciate the SUGAR SCRUB BARS revolution, let’s build confidence with basic concepts about exfoliation and how the solid format improves the experience and offers sustainable lifestyle changes.
H3: Building Confidence with Basic Concepts: The Science of Exfoliation
Exfoliation is essential for healthy skin, and sugar is one of the best choices for two key reasons:
- Gentle Mechanical Exfoliation: Sugar crystals are rounded, making them less harsh on the skin compared to sharper particles like salt or crushed nut shells. As you rub the SUGAR SCRUB BAR on your skin, the crystals gently buff away dead surface cells.
- Humectant Properties: Sugar is a natural humectant, meaning it draws moisture from the environment into the skin. This dual-action process (exfoliation followed by hydration) ensures your skin isn’t just smooth, but truly moisturized.
H3: Addressing Common Concerns: The Mess-Free Advantage
The biggest hurdle with traditional jar scrubs is the mess and the potential for contamination. SUGAR SCRUB BARS solve both problems.
- Zero-Mess Application: Because the SUGAR SCRUB BARS are solid, you simply rub the bar on your wet skin—no scooping, no spilling, and no sugar pooling on the shower floor.
- No Water Contamination: Traditional jar scrubs often get water inside them, which can introduce bacteria and require the use of synthetic preservatives. The solid bar format inherently avoids this, promoting a sustainable lifestyle change toward cleaner, more natural ingredients.
- Encouraging Reassurance for Beginners: Working with melt-and-pour ingredients is much easier than traditional soap making. If you can melt chocolate, you can make these SUGAR SCRUB BARS!
🧈 Section 2: Core Methods: The Essential SUGAR SCRUB BAR Recipe
This step-by-step guidance shows you exactly how to mix and mold the perfect SUGAR SCRUB BARS designed for maximum efficacy and durability.
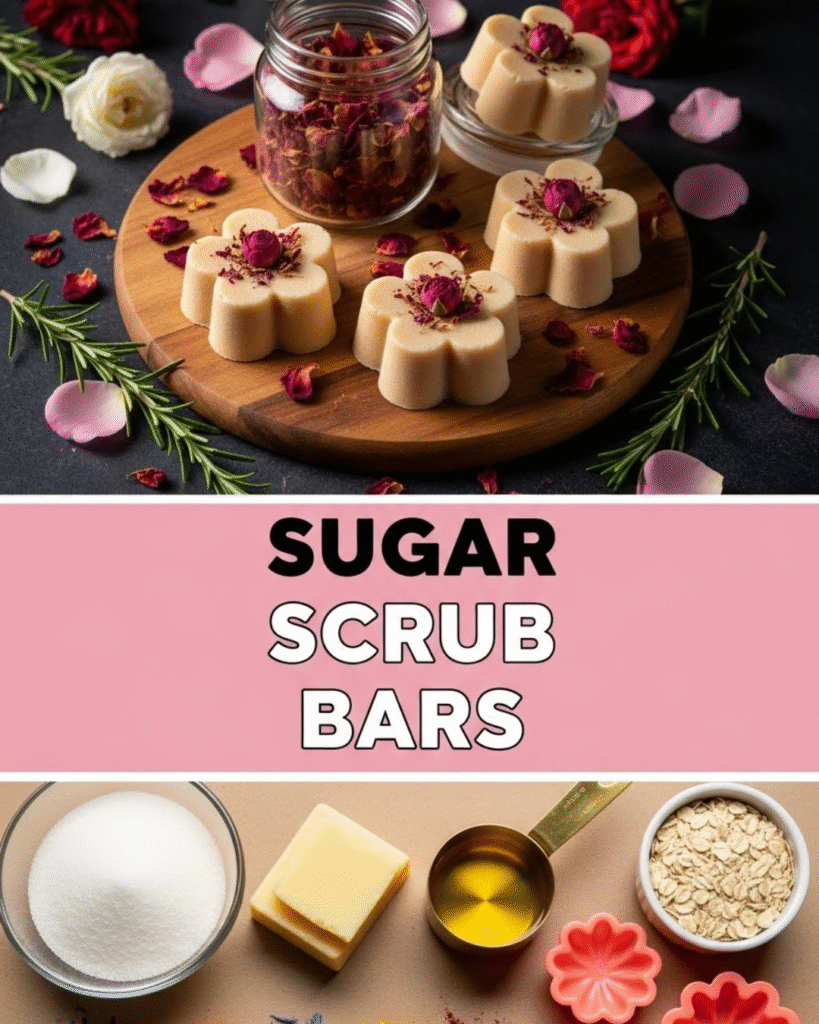
Tools and Ingredients
| Tool Requirement | Quantity | Ingredient | Purpose |
| Silicone Mold (Soap or Muffin) | $1 \text{ cup}$ | Melt-and-Pour Soap Base (Goat’s Milk or Glycerin) | Provides structure and extra lather. |
| Double Boiler/Microwave-Safe Bowl | $1/2 \text{ cup}$ | Shea Butter or Cocoa Butter | Deep moisturizer and binder (solid at room temp). |
| Measuring Cups/Spoons | $2 \text{ cups}$ | Granulated White Sugar (or Brown Sugar for a gentler scrub) | The primary exfoliator. |
| Whisk/Spatula | $1 \text{ tbsp}$ | Jojoba, Almond, or Coconut Oil | Extra emollient for skin conditioning. |
| — | $10 \text{-} 20 \text{ drops}$ | Essential Oil (Lavender, Citrus, etc.) | Scent and self-care boost. |
Step-by-Step Process (Core Methods)
- Melt the Base (Actionable Language): Chop the Melt-and-Pour Soap Base and the solid Shea Butter into small cubes. Melt them together gently in a double boiler or in the microwave using short $30 \text{-} second$ bursts. Stir until the mixture is completely liquid and clear.
- Cool Slightly: Remove the melted mixture from the heat. Allow it to cool for $2 \text{-} 3 \text{ minutes}$. Safety consideration: Adding sugar when the base is too hot will dissolve the sugar, ruining the scrub texture.
- Mix the Dry Ingredients: Add the $1 \text{ tablespoon}$ of liquid oil and the $10 \text{-} 20$ drops of essential oil to the slightly cooled base. Slowly incorporate the $2 \text{ cups}$ of sugar. Stir constantly until the mixture resembles wet sand. The goal is to suspend the sugar evenly throughout the thick mixture.
- Pour and Press (Timing and Planning Considerations): Spoon the mixture into your silicone molds. Press down firmly with the back of the spoon to ensure the bars are compact and free of air pockets.
- Set and Cure: Let the SUGAR SCRUB BARS set completely at room temperature for $2 \text{-} 4 \text{ hours}$. You can speed this up by placing them in the refrigerator for $1 \text{ hour}$.
- Unmold and Store: Once fully hardened, pop the bars out of the mold. They are ready to use immediately!
🌸 Section 3: Advanced Strategies: Customizing Your Bars
One of the greatest benefits of making your own SUGAR SCRUB BARS is the ability to customize approach for specific skin needs or a luxury self-care experience. These are expert-level insights for advanced results.
H3: Creative Solutions: Targeting Different Skin Types
You can adjust the ingredients to make the SUGAR SCRUB BARS perfect for sensitive or extra dry skin.
- For Sensitive Skin (Gentle Progress): Use Brown Sugar instead of granulated white sugar—it’s finer and softer. Use a larger ratio of liquid oil (up to $2 \text{ tbsp}$) and less soap base for a creamier, less abrasive bar. This is a supportive, non-judgmental language approach to gradual progress for sensitive users.
- For Deep Hydration (Dry Skin): Add $1 \text{ teaspoon}$ of Vitamin E Oil to the melted base. Vitamin E is an antioxidant with scientific backing for healing and deep conditioning. Also, consider using Cocoa Butter instead of Shea Butter for its heavier, longer-lasting moisturizing properties.
H3: Ways to Customize Approach: Adding Color and Scent
Elevate the look and feel of your SUGAR SCRUB BARS using safe, natural additives.
- Natural Color: Stir in $1/2 \text{ teaspoon}$ of natural mica powder (cosmetic grade) or a pinch of finely ground turmeric (for yellow/gold) or beetroot powder (for pink/red) into the melted base before adding the sugar.
- Targeted Essential Oils:
- Relaxation: Lavender and Chamomile for a calming nighttime scrub.
- Energy Boost: Grapefruit and Peppermint for an invigorating morning scrub.
- Immunity/Cleanse: Tea Tree and Eucalyptus for a scrub targeting breakouts or post-workout cleaning. Remember to follow dilution guidelines for essential oils.
❄️ Section 4: Troubleshooting and Common Challenges
Making SUGAR SCRUB BARS is straightforward, but heat and ingredient ratios can cause common issues. Here are practical troubleshooting tips.
Featured Snippet Potential: “Why are my homemade sugar scrub bars crumbly and falling apart when I use them?”
Your sugar scrub bars are crumbly because the ratio of sugar to melted binder (soap base and solid butter) is too high. This means there wasn’t enough melted base to properly encapsulate the sugar crystals. To fix crumbliness, you need to melt the bars down again, add an extra $1/4 \text{ cup}$ of melted Shea or Cocoa Butter, and perhaps a small splash of liquid carrier oil, before repouring and pressing firmly into the mold.
Practical Troubleshooting Tips (Wellness Focus)
- Problem: The sugar settled to the bottom of the mold after cooling.
- Obstacle: The base mixture was too hot or too thin when the sugar was added, allowing the sugar to sink before the bars set.
- Solution: Preventive measures: Next time, ensure the mixture cools enough that it starts to look opaque and thicken before adding the sugar. Stir continuously until the moment you pour the mixture into the molds. If you’ve already poured, you can stir the mixture in the mold after about $15 \text{ minutes}$ of cooling to suspend the sugar again.
- Problem: The bars melt too quickly in the shower.
- Obstacle: Too much liquid oil or not enough solid butter/soap base.
- Solution: Alternative Approaches: Store your SUGAR SCRUB BARS outside the immediate spray of the shower, ideally in a cool, dry spot. For the next batch, increase the solid butter ratio by $1 \text{ tablespoon}$ and decrease the liquid oil by $1 \text{ teaspoon}$.
- Problem: My skin feels itchy or irritated after using a bar.
- Obstacle: Allergy to a specific essential oil or fragrance.
- Solution: Supportive, non-judgmental language: Stop using the bar immediately. For the next batch, stick to unscented oils and no essential oils. Focus on using only the pure Shea Butter and sugar, as these are the least likely to cause reactions.
📈 Section 5: Maximizing Results: Next Level Self-Care
Once you’ve mastered the basic SUGAR SCRUB BARS, you can integrate them into a complete and sustainable lifestyle change routine.
- Show How to Build Upon Basic Success (Layering): After using your SUGAR SCRUB BARS, your skin is perfectly primed to absorb moisturizers. Immediately apply a light layer of body butter or a nourishing lotion while your skin is still damp. This simple layering technique maximizes the hydration benefits.
- Maintenance and Long-Term Considerations: Cure your finished bars for $24 \text{ hours}$ before wrapping them individually in wax paper and storing them in an airtight container away from heat. Properly stored, your SUGAR SCRUB BARS can last for 6 months, offering excellent cost-saving benefits.
- Suggest Complementary Strategies (Gifting): These bars make beautiful, thoughtful, and real-world scenarios gifts! Use unique silicone molds (like flowers or seasonal shapes) and tie them with a ribbon. Gifting your homemade creations is a wonderful way to share the benefits of natural self-care. (Internal Linking Opportunity: Learn about “Best Natural Moisturizers to Pair with Your Scrubs.”)
✅ Conclusion: Your Capability to Achieve Silky Skin
You have now unlocked the simple, elegant solution for exfoliation with these amazing SUGAR SCRUB BARS. By implementing this zero-mess DIY method and learning how to customize approach with nourishing butters and oils, you have achieved a sophisticated tool for self-care and sustainable lifestyle changes.
Embrace the feeling of your beautifully smooth, hydrated skin. Your capability to succeed in crafting professional-quality body products is clear!
Will you try the energizing peppermint blend for your next batch, or are you going to use cocoa butter for an extra luxurious, hydrating bar?