Discover the best ways to deep clean your bathroom and transform your space into a sparkling oasis. Learn step-by-step methods to tackle grime and sanitize effectively.
Have you ever walked into your bathroom, looked at the soap scum on the shower door or the dust gathering in the vents, and felt an immediate sense of overwhelm? You are not alone. The bathroom is one of the hardest-working rooms in any home, and because of the constant moisture, it is the prime real estate for mold, mildew, and mineral buildup. But here is the good news: you don’t need a team of professionals to get that “luxury hotel” sparkle. By mastering the right ways to deep clean your bathroom, you can reclaim your sanctuary and ensure a hygienic environment for you and your family.
In this comprehensive guide, we are going to unlock the secrets to a truly deep clean. We will move beyond the surface-level wipe-down and dive into the nooks and crannies that usually get ignored. You will learn how to use effective cleaners, time-saving techniques, and smart maintenance habits. You have the capability to achieve a professional-grade result with just a little elbow grease and the right plan. Let’s roll up our sleeves and transform your bathroom today!

Foundation: The Essentials of a Deep Clean
Before you start scrubbing, it is essential to build confidence by understanding the “why” and “what” of the process. A deep clean differs from your weekly tidy-up because it focuses on sanitization and removing long-term buildup.
Why Surface Cleaning Isn’t Enough
Standard cleaning often misses the microscopic spores and hard-water deposits that accumulate over time. Deep cleaning addresses these issues at the root, which can actually extend the life of your fixtures and tile. If you are already interested in [sustainable home living], you’ll be happy to know that regular deep cleaning reduces the need for harsh, corrosive chemicals down the line.
Gathering Your Toolkit
To succeed, you need the right tools. You don’t need expensive gadgets, but a few basics will make the job much easier:
- Microfiber cloths: These trap dirt rather than pushing it around.
- An old toothbrush: Perfect for grout and faucet bases.
- A squeegee: Your best friend for glass and tile.
- White vinegar and baking soda: Natural powerhouses for dissolving minerals and deodorizing.
Safety First
Always ensure the room is well-ventilated. Bathrooms are small spaces, and even natural cleaners like vinegar can have strong vapors. If you are using specialized cleaners, never mix ammonia and bleach, as this creates dangerous fumes. Wear gloves to protect your hands, especially if you have sensitive skin or are working on [wellness-focused lifestyle changes].
Step-by-Step: The Core Deep Cleaning Process
Ready to begin? Follow these manageable steps to ensure every inch of your bathroom shines.
1. The Pre-Treat Phase
The secret to an easy deep clean is letting the products do the work for you.
- The Action: Spray your tub, shower walls, and toilet bowl with your chosen cleaner.
- The Wait: Let it sit for at least 10–15 minutes. This “dwell time” breaks down soap scum and kills bacteria, meaning you won’t have to scrub nearly as hard.
2. High-Level Dusting and Vents
Always work from top to bottom. If you clean the floor first, dust from the ceiling will just make it dirty again!
- The Vent: Use a vacuum attachment or a can of compressed air to clear out the dust from the exhaust fan.
- The Lights: Wipe down light fixtures and the tops of mirrors where dust likes to hide.
3. Tackling the Shower and Tub
Now that the cleaner has sat, use a stiff brush to scrub the tile and grout.
- The Chrome: Polish faucets with a 50/50 mix of water and vinegar to remove spots.
- The Glass: Use a squeegee after rinsing to prevent new water spots from forming immediately.
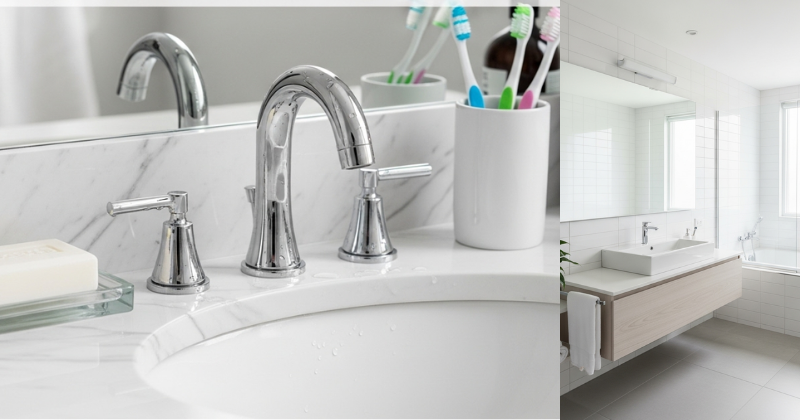
4. The Toilet and Vanity
Clean the “hidden” parts of the toilet, including the base and the caps covering the bolts. For the vanity, remove everything from the counter. Wipe the surface, then clean each individual item (like soap dispensers) before putting them back. This is a great time to [organize your bathroom essentials].
Advanced Strategies: Pro Tips for Tough Grime
Once you have the basics covered, use these expert-level insights to handle the most stubborn bathroom challenges.
Removing Hard Water from Showerheads
If your showerhead has uneven spray, it’s likely clogged with mineral deposits.
- The Pro Hack: Fill a plastic bag with white vinegar, submerge the showerhead in it, and secure it with a rubber band. Leave it overnight. In the morning, the minerals will have dissolved, and your water pressure will be restored!
Revitalizing Tile Grout
Grout is porous and absorbs stains easily.
- The Recipe: Make a paste of baking soda and a little water. Apply it to the grout lines and spray it with vinegar. Once the fizzing stops, scrub with your old toothbrush. This non-toxic method is incredibly effective at brightening dull floors.
Refreshing the Drains
Don’t wait for a clog to happen. Pour half a cup of baking soda down the drain, followed by half a cup of vinegar. Let it sit for 10 minutes, then flush with boiling water. This keeps drains smelling fresh and helps prevent hair and soap buildup. This is a vital [preventative maintenance tip] for every homeowner.
Troubleshooting: Common Challenges and Solutions
Even with a plan, you might encounter some stubborn spots. Here is how to handle frequent obstacles with encouragement.
“I can’t get the mold out of the silicone caulk.”
- The Solution: Caulk is tricky. If mold has grown behind the silicone, cleaning won’t help.
- The Fix: You may need to remove the old caulk and apply a fresh bead of mold-resistant silicone. It’s an easy [DIY home project] that makes a world of difference in the final look of your deep clean.
“My bathroom still smells ‘musty’ even after cleaning.”
- The Advice: The smell might be trapped in fabric. Wash your shower curtain, bath mats, and even your towels in hot water with a cup of vinegar.
- The Alternative: Check the wax ring at the base of your toilet. If it’s leaking slightly, it can cause a persistent odor.
“The streak-free mirror is impossible!”
- The Secret: Stop using paper towels! They leave lint behind. Use a flat-weave microfiber cloth or even an old newspaper. Wipe in a “Z” pattern for a perfectly clear finish.
Maximizing Results: Maintenance and Long-Term Success
To build upon your hard work, implement a few small habits to keep the “deep clean” feeling alive for longer.
The 60-Second Daily Reset
After every shower, use a squeegee on the glass and walls. This takes one minute but prevents 90% of soap scum buildup. Pair this with a quick wipe of the sink after you brush your teeth to keep toothpaste stains at bay. These [small daily habits] lead to big results.
Strategic Product Choice
Switch to liquid soap instead of bar soap in the shower. Bar soap contains fats and proteins that react with minerals in the water to create “soap scum.” Liquid soap is a detergent that doesn’t create the same heavy residue, making your next deep clean significantly easier.
Featured Snippet: How often should you deep clean a bathroom?
You should deep clean your bathroom once a month to prevent the buildup of mold, mildew, and hard-water minerals. While surface cleaning (like wiping counters and cleaning the toilet) should happen weekly, a monthly deep clean involving venting, grout scrubbing, and showerhead descaling ensures a hygienic and well-maintained space.
Conclusion
Mastering the various ways to deep clean your bathroom is an empowering way to improve your home environment. You have discovered that you have the capability to succeed in tackling even the toughest grime with a structured approach. By dedicating time to these thorough methods, you achieve a level of cleanliness that makes your daily routine feel more peaceful and organized.
You’ve got this! Start today by picking one area—maybe that showerhead or the vanity—and see how much better it feels. Your bathroom is your space to recharge; it deserves to shine.