Learn how to make beeswax and coconut oil candles, a simple recipe that fills your home with a warm glow. Discover the joy of natural DIY candle making today!
There is something truly magical about the soft, golden flicker of a candle, especially when you know you crafted it with your own two hands. If you have ever been concerned about the soot or synthetic chemicals found in traditional paraffin candles, you are not alone. Many homeowners are looking for cleaner, more sustainable ways to brighten their living spaces. That is why learning how to make beeswax and coconut oil candles is such a game-changer.
By the end of this guide, you will unlock a rewarding new skill that combines the sweet, natural scent of honey with the smooth, clean-burning properties of coconut oil. You will transform simple, raw ingredients into beautiful, functional decor that promotes a healthier home environment. This process is not only cost-effective but deeply satisfying. Whether you want to create the perfect personalized gift or simply enjoy a relaxing evening by candlelight, you have the capability to succeed. Let’s dive into this achievable DIY project and light up your life!
Foundation: Why Choose Beeswax and Coconut Oil?
Before we start melting and pouring, let’s build your confidence by understanding why this specific combination is the gold standard for natural candles. Many beginners worry that DIY candles won’t burn as well as store-bought ones, but the “secret sauce” lies in the blend.
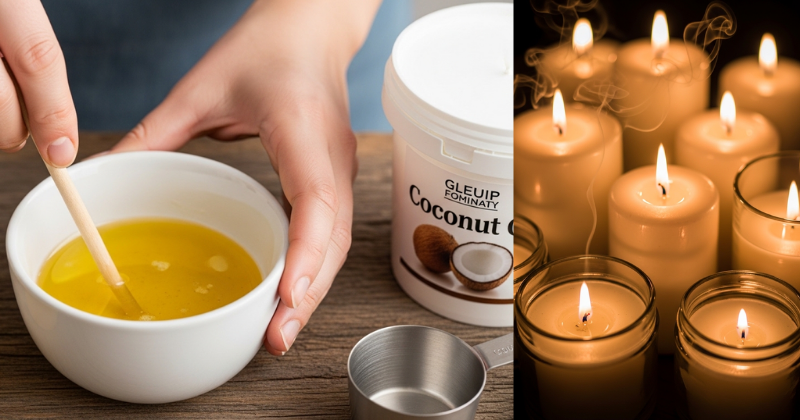
Pure beeswax is famous for its long burn time and its ability to emit negative ions that help purify the air. However, beeswax on its own is very hard and can sometimes “tunnel,” leaving a lot of wasted wax on the sides of your jar. By adding coconut oil, you lower the melting point and create a softer wax. This ensures your candle burns evenly and throws scent much better. It is a match made in heaven for anyone seeking a professional-quality finish at home.
H3: The Benefits of This Natural Blend
- Clean Burning: Unlike paraffin, these candles don’t release petroleum-based soot into your lungs or onto your walls.
- Air Purification: Beeswax naturally helps neutralize pollutants and allergens in the air.
- Cost-Efficiency: Buying raw materials in bulk allows you to make dozens of candles for a fraction of the price of luxury boutique brands.
H3: Essential Tool and Safety Checklist
You don’t need a specialized laboratory to make these. You likely have most of these items in your kitchen right now:
- A Double Boiler: Or a heat-safe glass bowl over a pot of water.
- Glass Jars: Mason jars or recycled jam jars work perfectly.
- Wicks: Cotton or wood wicks are both great options.
- Thermometer: A simple candy thermometer helps ensure you don’t overheat the wax.
- Safety First: Never leave melting wax unattended, and always keep a fire extinguisher or baking soda nearby in the kitchen.
Step-by-Step Process: Crafting Your First Candle
Breaking this down into manageable steps makes the process feel easy and fun. From setup to the final pour, here is exactly how to achieve success on your first try.
Step 1: Prep Your Containers
Clean and dry your glass jars thoroughly. Place a small dab of hot glue or a “wick sticker” at the bottom center of the jar and press your wick into place. To keep the wick straight while the wax sets, you can use a clothespin or a pencil laid across the top of the jar to hold it upright.
Step 2: Measure and Melt
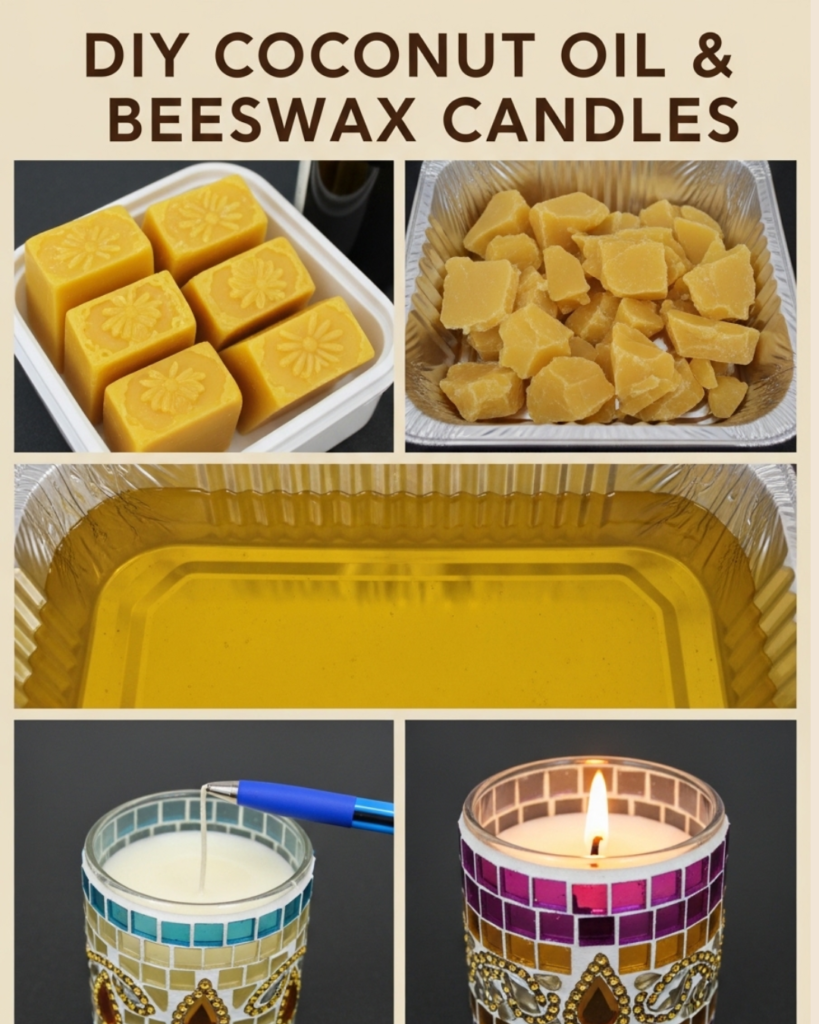
The ideal ratio for a smooth-burning candle is about 75% beeswax to 25% coconut oil. For a standard 8-ounce jar, you will need approximately 6 ounces of beeswax pellets and 2 ounces of solid coconut oil.
- Place the beeswax in your double boiler over medium-low heat.
- Once the beeswax is almost entirely liquid, add the coconut oil.
- Stir gently with a wooden skewer until the mixture is clear and fully combined.
Step 3: Cool and Scent
Remove the wax from the heat once it reaches about 160°F (71°C). If you want to add essential oils, wait until the temperature drops to around 150°F (65°C). This prevents the delicate oils from “burning off” and losing their scent. Stir for at least 30 seconds to ensure the scent is distributed evenly throughout the beeswax and coconut oil mixture.
Step 4: The Pour
Slowly pour the liquid wax into your prepared jars, leaving about half an inch of space at the top. Slow pouring prevents air bubbles from forming. Let the candles sit undisturbed at room temperature for at least 24 hours. Resisting the urge to move them is the hardest part, but patience ensures a perfect, crack-free surface!
Advanced Strategies: Pro Tips for Customization
Once you have mastered the basic recipe, you can start experimenting with expert-level variations. This is where you can truly let your creativity shine and adapt the process to your personal style.
H3: Perfecting the “Scent Throw”
Many people ask, “Why doesn’t my natural candle smell as strong as the ones from the mall?” The answer is usually the “scent load.” You can safely add up to 1 ounce of essential oil per pound of wax. For a relaxing bedroom vibe, try a Lavender and Eucalyptus blend. For a cozy kitchen feel, opt for Cinnamon and Sweet Orange.
H3: Creative Solutions for Color and Texture
- Natural Dyes: You can use a tiny pinch of turmeric for a deeper yellow or dried herbs for a rustic, botanical look.
- Botanical Toppings: Just as the wax begins to skim over (harden on top), you can sprinkle dried rose petals or lavender buds around the edges for a “boutique” look.
- Wood Wicks: If you love the sound of a crackling fireplace, swap your cotton wick for a wood wick. They work beautifully with the beeswax and coconut oil blend.
Troubleshooting: Common Challenges and Solutions
If your candle doesn’t look perfect the first time, don’t worry! Most DIY candle issues are easy to fix and provide a great learning experience.
- Problem: The candle has a “sinkhole” near the wick. This happens if the wax cools too quickly. Solution: Save a little bit of wax from your original pour. Once the candle is set, re-melt that leftover wax and pour a thin “top-off” layer to fill the hole.
- Problem: The wax is cracking on top. This usually means the room was too cold. Solution: Use a hairdryer on low heat to gently melt the top surface until it smooths out. Next time, try wrapping your jars in a towel to slow down the cooling process.
- Problem: The flame is too small or keeps going out. This is often a “wicking” issue. Solution: Beeswax is heavy. If the flame is struggling, you may need a thicker “large-series” cotton wick next time to pull the wax up effectively.
Preventive Measures
Always trim your wick to about 1/4 inch before lighting. This prevents the flame from getting too large and producing smoke. Also, for the first burn, let the candle stay lit until the melted wax reaches all the way to the edges of the jar. This prevents “memory tunneling” and ensures you get the most life out of your candle.
Maximizing Results: Building Your DIY Lifestyle
Success with candle making often leads to a desire to explore other areas of natural home care. You can build upon your success by looking into other related projects that use similar ingredients.
Complementary Strategies
The beeswax and coconut oil you purchased for this project are incredibly versatile. You can use the leftovers to create an easy step by step strawberry and coconut oil lip balm recipe for smooth, moisturized lips or even a natural wood polish for your furniture. Integrating these projects creates a cohesive, sustainable lifestyle that feels both luxurious and responsible.
Maintenance and Long-Term Use
Store your finished candles in a cool, dark place with the lids on. This preserves the essential oils and prevents the wax from yellowing over time. If you find you enjoy this hobby, consider buying your beeswax in bulk from local beekeepers. Not only does this support local agriculture, but it also gives your candles a unique, seasonal scent based on the flowers the bees were visiting!
Conclusion: Ignite Your Creativity
You have now discovered exactly how to make beeswax and coconut oil candles using a simple, effective recipe. From preparing your first jar to troubleshooting advanced pours, you have the knowledge to fill your home with light and warmth safely and naturally.
This journey into candle making is more than just a craft; it is an empowering step toward self-sufficiency and mindful living. You have the capability to create something beautiful and healthy for your family. So, gather your jars, melt your wax, and enjoy the transformative power of a handmade glow. You’ve got this!