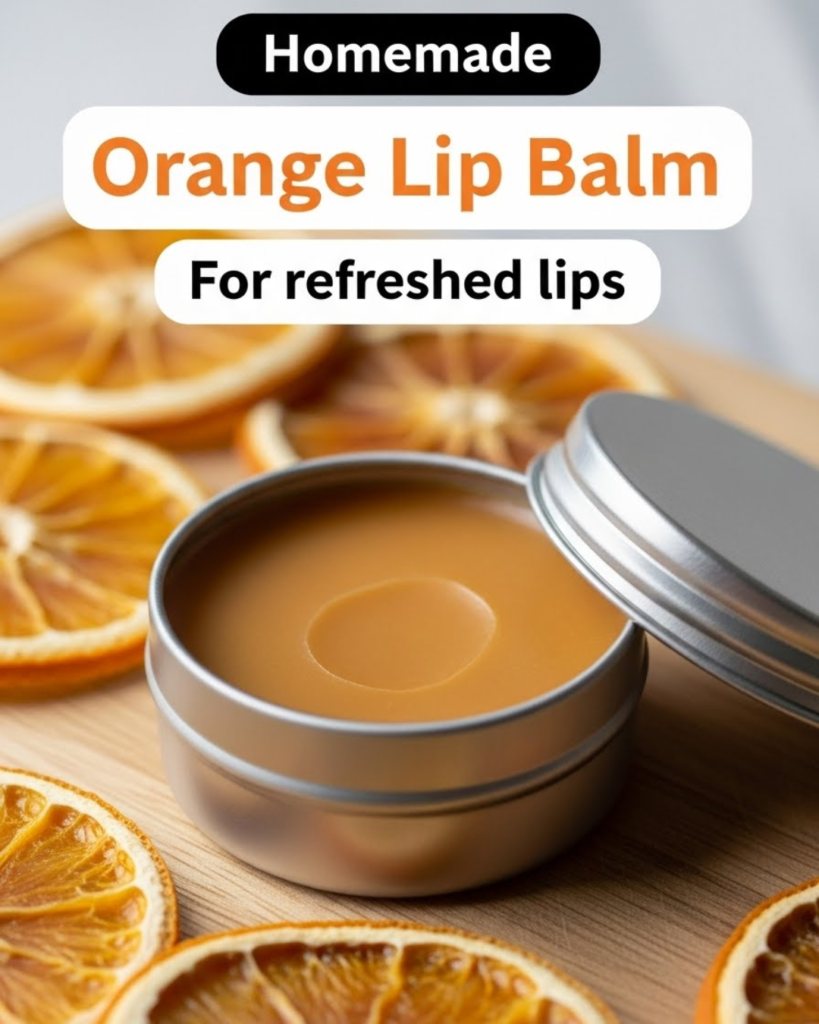
Create a zesty homemade orange lip balm recipe to soothe dry lips naturally. Discover how to achieve soft, hydrated lips with this easy DIY beauty guide today.
Have you ever looked at the back of your favorite lip balm tube and felt confused by a long list of chemical ingredients you can barely pronounce? You are not alone! Many of us want to nourish our skin without worrying about synthetic fillers or artificial fragrances. What if you could capture the bright, uplifting scent of a sun-ripened orchard while giving your lips the deep hydration they crave? You are about to discover how a few simple ingredients can be transformed into a professional-quality salve. By mastering this homemade orange lip balm recipe, you will unlock the secret to a perfectly pampered pout.
This DIY journey is all about empowerment and self-care. You don’t need an expensive lab or complicated tools to achieve amazing results. Instead, you will use the power of nature—think creamy butters and pure essential oils—to create a product that is as effective as it is luxurious. Get ready to transform your beauty routine and achieve the soft, healthy lips you deserve. You have the capability to create something wonderful right in your own kitchen!
Foundation: Understanding Your DIY Ingredients
Before we start melting and mixing, let’s build your confidence with the basics of balm formulation. To create a successful homemade orange lip balm recipe, you need a perfect balance of three key components: wax, butter, and oil.
The Magic Trio of Texture
- Beeswax (The Protector): This is what gives your balm its structure. It creates a breathable barrier on your lips, locking in moisture and protecting you from harsh winds or dry indoor air.
- Shea or Cocoa Butter (The Nourisher): These fats are incredibly rich in vitamins. They sink deep into the skin to repair cracks and provide that “velvety” feel we all love.
- Carrier Oils (The Hydrator): Coconut oil or sweet almond oil acts as the delivery system, making the balm easy to spread and adding a beautiful shine.
Why Orange Essential Oil?
Orange oil isn’t just for the amazing smell! It is naturally rich in antioxidants and has a cheerful, mood-boosting effect. When you use a homemade orange lip balm recipe, you are getting a hit of aromatherapy every time you apply it. It is important to use “Sweet Orange” oil, as it is generally non-phototoxic, meaning it is safe to wear in the sun.
Reassurance for Beginners
It is totally normal to feel a bit hesitant about working with wax and oils, but think of it like a very simple cooking project. If you can melt chocolate, you can make lip balm! This process is forgiving, cost-effective, and gives you the satisfaction of knowing exactly what is going onto your body.
Step-by-Step: Crafting Your Orange Lip Balm
Ready to get started? Follow this clear, actionable process to achieve a smooth and professional finish for your batch of balms.
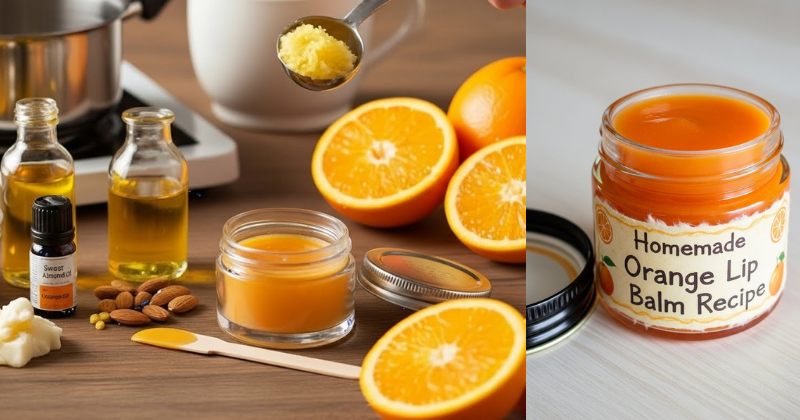
Equipment and Ingredients
- 2 tablespoons Beeswax pellets
- 2 tablespoons Shea butter
- 2 tablespoons Virgin coconut oil
- 15-20 drops Sweet Orange essential oil
- Small lip balm tins or plastic tubes
- A glass measuring cup (pyrex) and a small pot (for a double boiler)
The Core Method
- Prepare the Double Boiler: Fill your small pot with an inch of water and place it on medium-low heat. Place your glass measuring cup inside the pot. This ensures your ingredients melt gently without burning.
- Melt the Solids: Add the beeswax, shea butter, and coconut oil to the glass cup. Stir occasionally with a wooden skewer or a metal spoon until the mixture is a clear, golden liquid.
- The Cooling Gap: Remove the cup from the heat. Let it sit for about 60 seconds. You want it to be liquid but not boiling hot when you add the essential oils to preserve their potency.
- Add the Spark: Stir in your sweet orange essential oil. The scent will immediately fill your kitchen—it’s the best part!
- The Pour: Carefully pour the liquid into your tins or tubes. Work quickly but steadily, as the wax will begin to set almost immediately.
- The Set: Let your balms sit undisturbed for at least 1 hour. Do not put the lids on until they are completely cool to avoid condensation.
Timing and Planning
The active “work” time for this project is only about 15 minutes. It is a fantastic way to spend a rainy afternoon, and one batch usually makes 6 to 8 tubes, which are perfect for gifting!
Advanced Strategies: Pro Tips for Customization
Once you have mastered the basic homemade orange lip balm recipe, you can share expert-level insights by experimenting with different variations.
Creating a “Creamsicle” Flavor
If you want to achieve that nostalgic orange-vanilla scent, simply add 5 drops of vanilla oleoresin or a tiny scrap of a real vanilla bean to the melting process. It makes the balm smell incredibly edible and comforting!
Adjusting the Firmness
Everyone has a different preference for how “hard” or “soft” their balm should be. If you live in a very hot climate, increase the beeswax by half a teaspoon to ensure it doesn’t melt in your pocket. If you prefer a very glossy, soft feel, add a bit more coconut oil.
Featured Snippet: How do I make my homemade lip balm stay smooth?
To make homemade lip balm stay smooth and prevent graininess, you should melt your ingredients slowly over low heat and cool the mixture quickly once poured. Graininess is often caused by shea butter cooling too slowly; placing your filled tins in the refrigerator for the first 15 minutes of cooling helps the fats solidify at the same time, ensuring a silky-smooth texture.
Troubleshooting: Common Challenges and Solutions
Even pro DIYers run into obstacles sometimes. Here is how to handle frequent setbacks with a positive attitude:
- “My balm is too hard to swipe”: No problem! Simply pop the tins back into your double boiler, melt them down, and stir in another teaspoon of carrier oil.
- “There are bubbles on top”: This usually happens if you pour too fast or stir too vigorously. For your next batch, try to pour closer to the container and stir gently.
- “The scent faded quickly”: Essential oils can evaporate if added to boiling hot wax. Ensure the mixture has cooled slightly before adding your orange oil next time.
Preventive Measures
Always clean your containers with a bit of rubbing alcohol before pouring. This ensures your homemade orange lip balm recipe stays fresh and shelf-stable for 6 to 12 months!
Maximizing Results: Completing Your Wellness Routine
Now that you have beautiful, orange-scented lips, you can build upon this success by exploring other natural home and beauty rituals.
Next-Level Tips
- Internal Link Opportunity: If you love the smell of orange, discover how to make cozy candles at home using citrus rinds and soy wax.
- Internal Link Opportunity: Keep the rest of your skin just as soft by learning to make homemade organic magnesium lotion.
- Internal Link Opportunity: For a total facial refresh, try a DIY face cream with rosehip oil alongside your new lip balm.
- Internal Link Opportunity: If you’re in a cleaning mood after your DIY session, check out how to clean walls fast to keep your workspace sparkling.
- Internal Link Opportunity: Keep your bathroom sanctuary fresh by learning why mold keeps coming back in bathrooms and how to stop it.
Long-Term Sustainability
Making your own beauty products is a wonderful way to reduce plastic waste. You can reuse your glass tins over and over again. By choosing high-quality, organic ingredients, you are achieving a higher standard of care for your body and the planet.
Conclusion: Achieve Your Natural Glow
You have now mastered the art of the homemade orange lip balm recipe. You have moved from being a consumer of mysterious chemicals to a creator of pure, effective skincare. By following these steps, you have achieved a product that provides genuine hydration and a delightful sensory experience every time you use it.
The journey to a more natural lifestyle is paved with these small, achievable successes. We encourage you to share your new balms with friends—they make the perfect thoughtful gift! You are more than capable of taking control of your beauty routine and enjoying the results of your hard work.