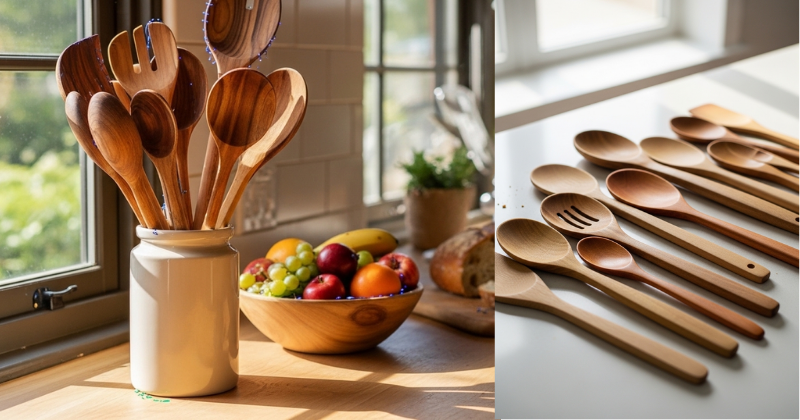
Wooden spoons, cutting boards, spatulas, and salad servers are the workhorses of any well-equipped kitchen — but they’re also among the most frequently damaged and prematurely discarded items in the home, almost always because of improper cleaning. Learning how to clean wooden utensils correctly isn’t complicated, but it does require understanding why wood behaves differently from metal, plastic, or ceramic. Wood is a living material — even after it’s been crafted into kitchen tools, it continues to expand, contract, absorb, and release moisture in response to its environment. Treat it right and your wooden utensils develop a beautiful patina, resist bacteria naturally, and last decades. Treat it wrong and they crack, warp, develop deep stains, and harbor exactly the bacterial residue you were trying to eliminate. This guide gives you everything you need to clean, sanitize, deodorize, and maintain wooden kitchen tools at a professional level.
Why Wood Requires Different Care Than Other Kitchen Materials
Understanding the material science behind wood helps you make intuitive decisions about care rather than memorizing rules without context. Wood is composed primarily of cellulose fibers bound by lignin — a complex polymer matrix that gives wood its structural integrity. These cellulose fibers are naturally hydrophilic: they readily absorb water molecules, swelling as they do so. When wood dries after absorbing moisture, it contracts. This constant swelling-and-contracting cycle, repeated aggressively over time, causes cracking, splitting, and warping.
Porosity and Bacterial Considerations
The porous structure of wood raises a concern that every kitchen professional addresses when considering how to clean wooden utensils: can bacteria survive and multiply in wood pores? Research from the University of California Davis by food microbiologist Dean Cliver demonstrated a fascinating answer — wood’s natural antimicrobial properties actually work in your favor. Bacteria drawn into wood’s microscopic pores became trapped and died, unable to multiply, while bacteria on plastic cutting board surfaces survived and multiplied freely. This doesn’t mean wooden utensils don’t need proper cleaning — surface bacteria absolutely require removal — but it does explain why well-maintained wooden kitchen tools aren’t the hygiene hazard they’re sometimes portrayed as.
The key phrase is “well-maintained.” Cracked, deeply scored wooden utensils with compromised surfaces provide channels where bacteria can survive beyond the reach of ordinary cleaning. This is precisely why proper cleaning technique and regular conditioning are inseparable — maintaining a smooth, sealed surface is as much a hygiene practice as the cleaning itself.
Wood Types and Their Cleaning Implications
Different wood species behave differently under cleaning conditions. Hardwoods — maple, walnut, cherry, teak, and beech — have tighter grain structures with smaller pores, absorb water more slowly, and resist warping and cracking better than softwoods. These are the woods used for quality kitchen utensils and cutting boards for precisely this reason. Bamboo, technically a grass rather than wood, has even tighter fiber structure but is more prone to splitting if dried too aggressively due to its laminated construction. Knowing your utensil’s wood type helps you calibrate how quickly it dries, how much oil it needs, and how cautiously you need to handle the water exposure during cleaning.
The Correct Daily Cleaning Method for Wooden Utensils
Daily cleaning of wooden utensils is the foundation of their entire care system — and the most common source of damage. The single most destructive thing you can do to wooden utensils is also one of the most tempting: putting them in the dishwasher.
Step 1: Clean Immediately After Use. Don’t let food residue dry on wooden utensils. Dried food — particularly protein-based residue from meat, eggs, or cheese — bonds to wood fibers and becomes significantly harder to remove without aggressive scrubbing that damages the surface. Rinse or wipe your wooden spoons, spatulas, and other utensils immediately after use, or within a few minutes, while residue is still hydrated and loose.
Step 2: Use Warm (Not Hot) Water. Fill your sink with warm water — approximately 40-45°C, comfortable to the touch but not scalding. Hot water accelerates moisture absorption into the wood fibers, amplifying the swelling and subsequent cracking risk when the utensil dries. Warm water cleans just as effectively while minimizing thermal stress on the wood.
Step 3: Apply a Small Amount of Dish Soap. Mild dish soap is perfectly safe for wooden utensils and does not damage them with brief contact — a persistent myth suggests soap strips natural oils from wood, but brief washing contact is insufficient to cause this. Apply soap to a soft cloth, sponge, or dish brush and wash all surfaces of the utensil. Avoid abrasive scourers or steel wool, which scratch wood surfaces and create the micro-channels that harbor bacteria.
Step 4: Rinse Thoroughly and Quickly. Rinse the utensil under warm running water to remove all soap residue. Work efficiently — minimizing total water contact time reduces the amount of moisture absorbed into wood fibers. A thorough rinse takes 10-15 seconds, not a long soak.
Step 5: Dry Immediately and Completely. This step is where most wooden utensil damage occurs through neglect. Never leave wooden utensils soaking in water, lying in a wet sink, or standing in a water-filled utensil holder. Pat them dry immediately with a clean dish towel, then stand them upright in an open container or lay them on a clean dry surface with maximum air circulation. Ensure all surfaces — including any crevices where the handle meets the utensil head — are dry before storage. Drying time varies from 30 minutes for thin utensils in warm, dry climates to several hours for thick cutting boards in humid environments.
Deep Cleaning and Sanitizing Wooden Utensils
Regular daily cleaning maintains cleanliness under normal use conditions, but certain situations require deeper sanitizing and odor elimination.
Natural Sanitizing Methods That Are Safe for Wood
Several effective sanitizing approaches work with wood’s properties rather than against them.
White Vinegar Sanitizing. Undiluted white vinegar (5% acetic acid) applied to wooden surfaces and allowed to sit for 5-10 minutes before rinsing provides effective sanitizing action. Acetic acid disrupts bacterial cell membranes and has documented efficacy against E. coli, Salmonella, and Listeria. Rinse thoroughly after the contact time and dry immediately. Vinegar application is safe for wooden utensils used occasionally — regular repeated application over time could potentially affect surface finish, so reserve this for situations requiring deeper sanitizing rather than daily use.
Hydrogen Peroxide Treatment. 3% hydrogen peroxide (standard pharmacy strength) applied to wooden surfaces provides oxygen-release sanitizing action. Apply with a spray bottle, allow 5-10 minutes contact time, then rinse and dry. Hydrogen peroxide is particularly effective for cutting boards used with raw meat. The combination method — applying vinegar first, rinsing, then applying hydrogen peroxide — provides broader antimicrobial coverage than either compound alone, as the two substances work through different mechanisms.
Boiling Water Rinse. For utensils without decorative elements or thin handles that might crack, pouring boiling water over surfaces immediately before rapid drying provides thermal sanitizing. This method is most appropriate for simple wooden spoons and spatulas rather than complex utensils or those with glued components.
The Salt and Lemon Deodorizing Scrub
Wooden utensils used for strongly flavored ingredients — garlic, onion, fish, certain spices — can retain odors even after thorough washing, because volatile aromatic compounds bind to wood fibers. The salt and lemon treatment is the most effective home remedy for odor elimination. Coarsely sprinkle kosher or sea salt over the wooden surface, then rub vigorously with a halved lemon, squeezing as you scrub. The mechanical abrasion of the salt crystals lifts odor-causing compounds from wood fibers while the citric acid and lemon’s volatile compounds counteract and neutralize them. Leave the mixture on the surface for 5 minutes, then rinse, dry, and condition. This treatment also gently resurfaces slightly rough wooden areas, leaving the wood feeling smoother.
Advanced Maintenance: Conditioning and Oiling Wooden Utensils
Cleaning properly removes surface contamination — but conditioning with oil creates the protected surface that makes wooden utensils resist moisture damage, staining, and bacterial adhesion in the first place. These two practices are inseparable components of proper wooden utensil care.
Choosing the Right Oil for Wooden Kitchen Items
The most critical distinction in oil selection is food-safe versus food-unsafe oils. Linseed oil (raw flaxseed oil) and tung oil are traditional wood-finishing products that are not food-safe in their conventional forms. Never use olive oil, vegetable oil, or other polyunsaturated cooking oils — they go rancid within weeks when applied to wood, creating unpleasant odors and potentially harmful oxidation products.
The correct choices for conditioning wooden kitchen utensils are food-grade mineral oil (the most widely recommended and most accessible option), fractionated coconut oil (which unlike regular coconut oil doesn’t solidify at room temperature and has a very long shelf life), and specialized wood conditioning products like Howard Butcher Block Conditioner or similar beeswax-oil blends. These options don’t go rancid, are completely food-safe, and penetrate wood effectively to restore moisture and create a protective barrier.
The Conditioning Process Step by Step
Apply conditioning oil when the utensil is completely dry — residual moisture prevents oil from penetrating wood fibers effectively. Warm the oil slightly (30 seconds in a microwave or setting the bottle in warm water) to reduce viscosity for better penetration. Apply a generous amount with a clean cloth, working oil into all surfaces including end grain areas where wood is most porous and moisture-vulnerable. Allow the oil to absorb for a minimum of 30 minutes — overnight is better. Then wipe away any excess that hasn’t absorbed. Unabsorbed oil sitting on the surface becomes sticky and attracts dust. Allow a final drying period of 2-4 hours before returning to use.
New wooden utensils benefit from 3-5 consecutive conditioning treatments in the first week of ownership, allowing each coat to fully absorb before applying the next. After this initial saturation, monthly conditioning maintains the protective layer under normal use conditions. Utensils used daily or washed frequently may benefit from bi-weekly conditioning.
Troubleshooting Common Wooden Utensil Problems
Even well-cared-for wooden utensils occasionally develop specific problems — and most are recoverable with the right intervention.
Reversing Warping and Cracking
Slight warping — when a wooden spoon or spatula develops a curve — typically results from uneven moisture exposure where one side absorbed more water than the other. The correction involves deliberately wetting the concave (curved inward) side and allowing it to dry supported in the correct flat position. Wet the concave surface thoroughly, then place the utensil curved-side-down on a flat surface with a weight pressing down the curved edges. As the concave side dries and contracts, it pulls the wood back toward flat. This process may require 2-3 repetitions over several days for significant warping.
For existing small cracks, food-grade mineral oil applied generously and allowed to penetrate overnight often plumps wood fibers sufficiently to close hairline cracks. Deeper cracks that penetrate a significant portion of the utensil’s cross-section unfortunately cannot be safely repaired — a deeply cracked utensil should be retired, as the crack provides channels for bacterial survival that no cleaning method fully addresses.
Removing Deep Stains and Discoloration
Stubborn stains from berries, beets, turmeric, and similar intensely pigmented ingredients require more than regular washing. Hydrogen peroxide (3%) applied and allowed to penetrate for 15-30 minutes before rinsing lightens many organic stains through oxidative bleaching. For turmeric staining specifically — one of the most persistent — direct sunlight exposure for several hours produces natural UV bleaching that significantly reduces yellow discoloration. After stain treatment, always follow with conditioning oil to restore moisture and surface protection.
Maximizing Longevity: Building a Complete Wooden Utensil Care System
Monthly Maintenance Routine
Beyond daily cleaning and regular conditioning, a brief monthly maintenance routine keeps wooden utensils in optimal condition long-term. Sand any rough or raised grain areas with 220-grit fine sandpaper, then follow with conditioning oil — sanding opens the wood grain, allowing the subsequent oil treatment to penetrate more deeply. Inspect all utensils for deep cracks or structural damage that makes them food-unsafe. Perform the salt-and-lemon deodorizing treatment on any utensils showing persistent odor issues. This 15-minute monthly ritual extends the life of quality wooden utensils from years to decades.
Proper Storage for Long-Term Preservation
Storage conditions significantly influence how long wooden utensils maintain their condition between use and cleaning. Store wooden utensils in a utensil holder that allows full air circulation — standing upright in an open container is ideal. Never store wooden utensils in closed, humid environments (like sealed containers or damp drawers) where trapped moisture accelerates bacterial growth and warping. Keep them away from heat sources including stove burners and heat vents, which cause rapid drying and cracking. A spot that receives some air circulation at room temperature preserves them most effectively.
Conclusion
Cleaning wooden utensils correctly transforms them from items you replace every couple of years into heirloom-quality kitchen companions that improve with age. The system is straightforward: wash promptly with warm water and mild soap, dry immediately and completely, sanitize deeply when needed with vinegar or hydrogen peroxide, deodorize with salt and lemon when necessary, and condition with food-grade mineral oil monthly. Each step protects both your health and your investment in quality wooden kitchen tools. Start today with a conditioning treatment for your existing wooden utensils — most of them are probably overdue — and experience firsthand how proper care transforms both their appearance and their performance.